Blended Box Mapping
By Neil Blevins
Created On: May 15th 2006
Updated On: Apr 9th 2024

Go here to read this tutorial in Russian.

Say I want to apply some dirt to a bunch of objects in my scene. While I could use procedural noise, I'd prefer to use bitmaps since that will make the dirt will look a little more organic. But I don't want to spend a long time setting up good UVs for all of the objects, because that will take awhile. This is a tutorial that discusses a quick and easy way to apply a noisy bitmap to a bunch of objects without the need to unwrap their uvs. The technique is called a Blended Box Map, or also sometimes referred to as a Triplanar.
What is a Blended Box Map?

So lets start with a reasonably random and noisy bitmap like the following...

Patern1

And you have a somewhat irregular object like this...

Object1

And you'd like to quickly apply this pattern to your object.

As already mentioned, one way is to unwrap your object's uvs. But this can take awhile to set up, especially if you have lots of objects in your scene.

A quicker way would be to use box mapping on the object. Box mapping is a mapping type that projects your texture from the six sides of a box at your object. So apply a UVW Mapping modifier to your object, set the mapping type as box, and render...

Seam

Well, that sort of worked, except there's a bunch of bad seams. Why is that? So if you use box mapping on an object that has rounded corners, faces of your mesh that point towards one of the 6 sides of the box map work fine. But if a face is near a 45 degree angle to the sides of the box, you get a seam where different sides of the box apply mapping to each face. For example, say a face is 44.5 degrees away from the front of the box map, it will receive mapping from the front of the box. Now say the next face is 45.5 degrees away from the front of the box map, it will receive mapping from the side of the box. So between those two faces you get a seam.

Lets look at the same problem on a sphere with a custom uv map applied using regular box mapping. Notice the seams right at the edges where faces are near a 45 degree angle to any given side of the box map.

Sphere1

If only there was some way to blend the seams on a box map?

That's where a Blended Box Map comes in. It's just like a regular box map, projecting the material from 6 different directions, but blends the seams so you don't notice them.

Seam

Blurry Seam

Here's a practical example, a robot character, which is made up of 291 separate objects...


and I want to apply some noisy dirt to all the pieces.


That's gonna be a pain to uvmap all those pieces of geometry, so lets use a Blended Box Map instead.

Assign the noisy bitmap above to a Blended Box Map instead of a regular box map, place it into the diffuse slot of a material assigned to the robot so you can see the result...


Looks the right size, and no visible seams. Now lets place the Blended Box Map in the mix slot of a blend material to blend between a metal material and a dirt material. White parts of your map will show the dirt material, black areas will show the metal material...


So there, I've added some dirt to 291 objects in just a few button clicks, no tweaking procedural parameters, no uv unwrapping.

There are many different ways to make a Blended Box Map...
All have advantages and disadvantages.

Max 2017 Ext 1 BlendedBoxMap

The best Blended Box Map is now built into 3dsmax 2017 Ext 1. It's called BlendedBoxMap and can be assigned as a map to any part of your material.


Here's a video showing the process for using 3dsmax 2017's BlendedBoxMap.


SoulburnScripts Blended Box Mapping Using UVWMapping Technique

The SoulburnScripts technique is a manual way to construct a blended box map using the 3dsmax base package and works in all renderers and versions of max prior to 2017. The trick is to apply 3 planar UVW Mapping modifiers using 3 different map channels to your objects, and then blend their edges using falloff maps.

Take a peak at the map tree...

Maps

And a look at the 3 uvw mapping modifiers...

Mapping

Also note, in the output section of the 2 falloff maps are curve controls, and modifying these curve controls achieve a sharper or blurrier transition on the edges.

And here's the results...

Sphere 2

Notice the blending between the edges. Now this isn't ideal for something with a regular pattern like this uv map, but lets go back to our original example of the noisy looking map. The seam is basically gone.

Blurry Seam

So rather than manually creating the map tree and applying the uvw modifiers, I've automated the process and wrote a maxscript that will make the map-tree and UVWMapping gizmos for you. Please visit my Soulburn Scripts for 3dsMax page and get the latest pack. Install the scripts, and run the script called blendedBoxMapMaker. Here's an interface snapshot...


To run the script, select the objects you want to apply the 3 UVW Mapping Modifiers to, in the script interface window choose Create Map: "Falloff Method" and Create Mapping Modifiers: "UVW Mapping Method", choose the bitmap you want to use for your blended box map, and hit "do".

It'll apply the modifiers to the objects...


And place the map tree into your chosen slot...


Here's a video showing the process above for applying a Blended Box Map to the robot head using the SoulburnScripts Blended Box Mapping Using UVWMapping Technique...

SoulburnScripts Blended Box Mapping Using Projections Technique

First off, you will need the free plugin CameraMapGemini v0.16 or higher by Markus Boos (http://www.projectgemini.net/CameraMapGemini/). Install the plugin, and run max. Now go back to the blendedBoxMapMaker script I showed you in the last section and change the "Create Mapping Modifiers" mode to "CameraMapGemini Method".


Run the script, select the robot, and notice a few changes.

First, instead of applying 3 UVWMapping modifiers, it applies a single CameraMapGemini modifier to your object, and creates 3 projection cameras.


These cameras will project your texture, much like how the UVW Mapping modifiers did, except the cameras are not attached to each separate object. Decoupling the projection position from the object position means no more misaligned projections. And if you need the projections to move with the objects, just parent the camera projection group (a point object seen in the above image in aqua) with the parent of your geometry hierarchy. Now whenever you move your whole robot, the projection cameras will move with it, and so the projection stays attached to your objects.

Now check out the CameraMapGemini modifier assigned to your objects...


Notice the modifier references your three projection cameras. But since there's only a single modifier, adding new objects to your robot is easy, just copy and paste an instance of this modifier to your new objects.

The visual results of the CameraMapGemini Method provides identical results to the UVW Mapping Method...


What's the best choice between the SoulburnScripts Blended Box Mapping Using UVWMapping and SoulburnScripts Blended Box Mapping Using Projections Technique?

The main advantages of using the UVWMapping Technique over the CameraMapGemini technique are...
The main disadvantages of using the UVWMapping Technique over the CameraMapGemini technique are... Here's an example of mis-alignment. I decide to move one of my bolts on the air vent on the robot AFTER I have set up a Blended Box Map using the "UVW Mapping Method". Since the UVW Mapping Gizmos are attached to my objects, moving the bolt moves just one of the gizmos. Now I have multiple gizmos in multiple locations in 3d space, instead of them all being nicely aligned.


Note: There is also a "CameraMapGemini Method" under "Create Map". I highly recommend not using this method, as it has a number of bugs. Stick to "Create Map: Falloff Method" and "Create Mapping Modifiers: CameraMapGemini Method".


In general, if you're going to use the Soulburnscript for your blended box mapping, I would recommend using the "UVWMapping" Technique, as it has the fewest downsides. But the other technique is there if you need them.

VrayTriplanarTex

Vray recently added a triplanar texture to version 3.3. Here's the interface...


It's simpler than the one built into 3dsmax 2017, but is available for older versions of max, and is far better than the soulburn scripts methods.

Here's a few notes on what the parameters do...


So why use this method instead of the Soulburn method? A number of reasons...
Of course, it has a few disadvantages...
A huge thanks to Vlado for writing this.

InstantUV

As a footnote, back in the earlier days of max (Max 4) there was a plugin called InstantUV that did this sort of thing. But the developer decided to stop selling it, and it never got recompiled for more modern versions of max.

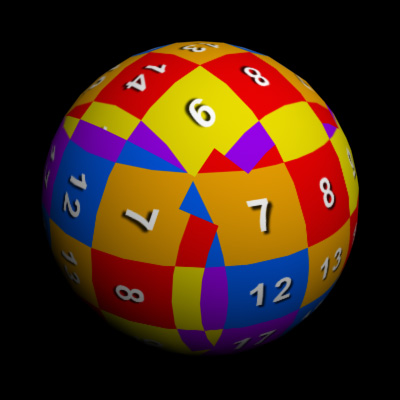
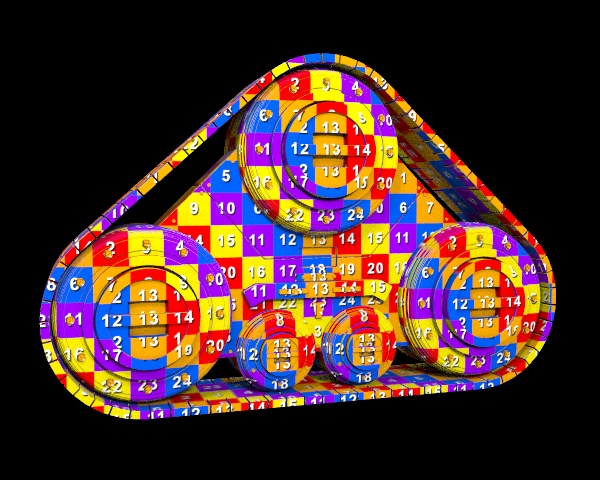
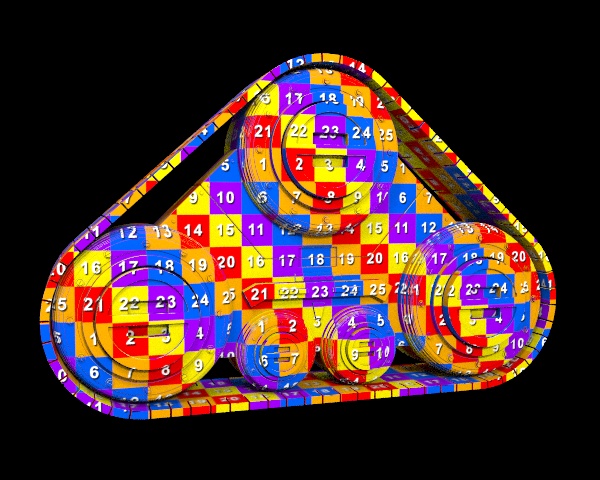
Here's a screencap from Robert Seidel:


Triplanar in Mari

Mari recently (2012) added a new feature called triplanar that does the blending we're after, but since Mari can only export texture maps in the end (and you'll need to spend time Uving your objects), you can't go in after the fact and change parameters to your box map in your 3d app once you've baked your final textures.

Triplanar in Substance Designer

Substance Designer also has a TriPlanar, but it also requires baking the result into a bitmap with UVs.

Further Reading
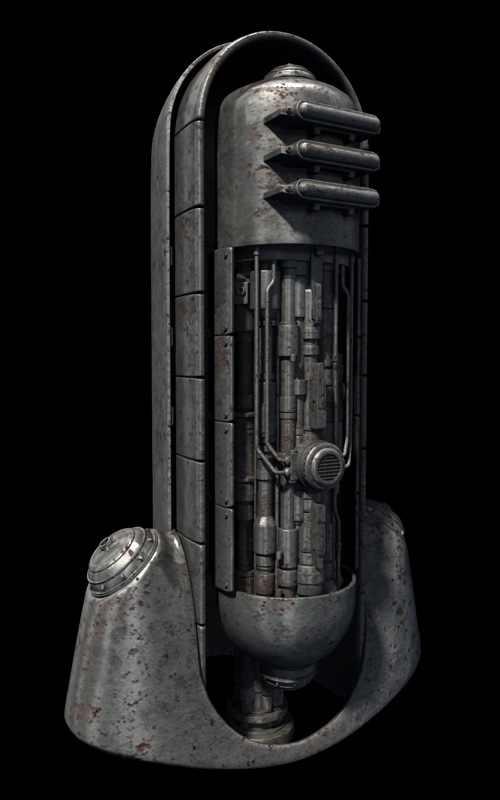
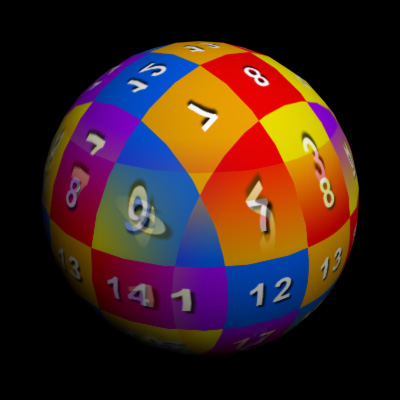
Anyways, hopefully you see the advantages of using this technique over unwrapping thousands of objects, and you can incorporate it into your workflow, choosing the best Blended Box Map for you.

Triplanar in Blender

So when I tried out Blender, one of the first things I wanted to know was how to achieve the Blended Box Map result. Thankfully, it does have the feature, and so this short tutorial will show you how to do it.


This site is ©2024 by Neil Blevins, All rights are reserved.
NeilBlevins.com TwitterMastodon BlueskyInstagram BloggerFacebook LinkedInArtStation KickstarterGumroad YouTubeIMDB