Just a few notes on a lighting phenomena that you should keep in mind
when setting up your lights. In CG, if we want texture to be more or
less apparent (like a strong bumpy texture), we can just increase or
decrease the amount of bump. However, in the real world, we don't have
that kind of option, and so the best way to remove texture is to move
your lights.
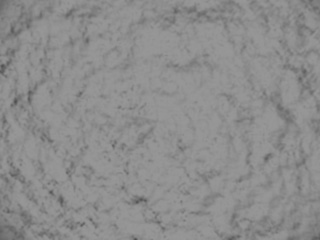
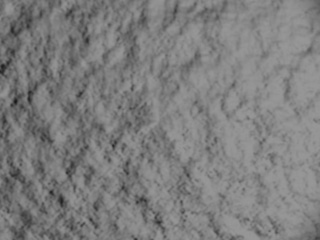
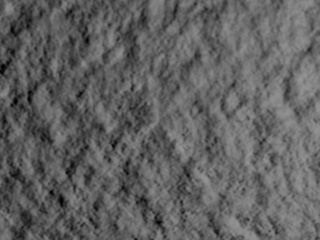
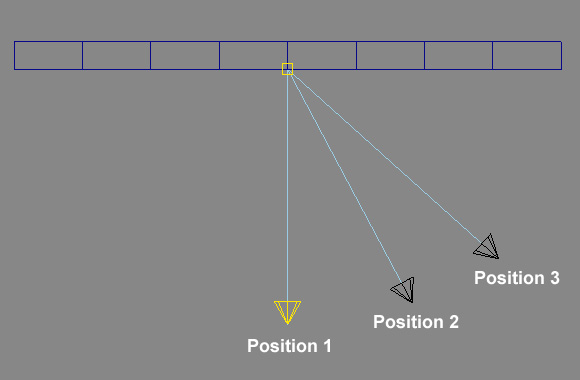
Lets say you have a bumpy wall. The following 3 images were produced in
3dsmax with a light directly from camera (position 1), at 22.5 degrees
to the
camera (position 2), and 45 degrees to the wall (position 3). Here's
the file (max
5 format).
Notice how the closer the light gets to Position 3, the more evident
the texture is. That's because as the light comes to a stronger glazing
angle (also known sometimes as a raking light), there's more of the
bump that's shadowed visible to the camera.
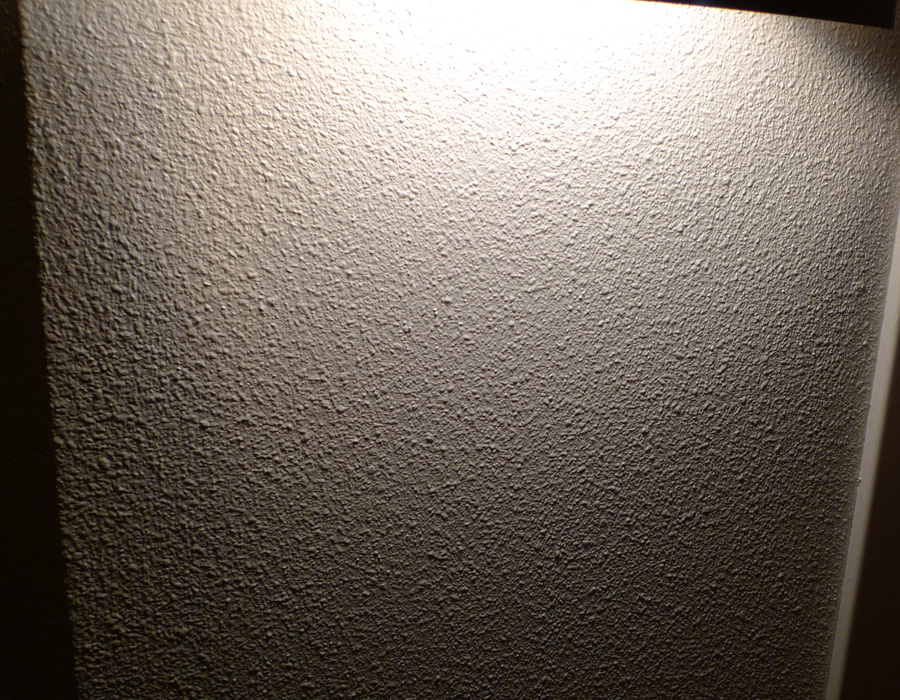
Here's a photo of a real wall with a real light. Notice as the texture
on the wall gets further from the light (ie, at a greater angle from
the light source), the bump gets stronger looking.
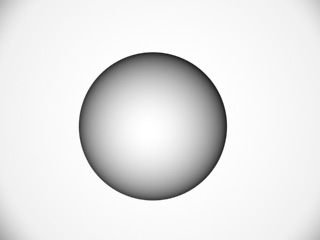
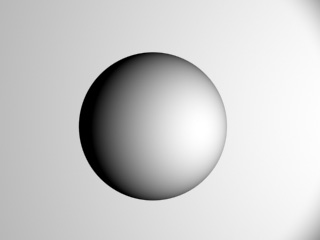
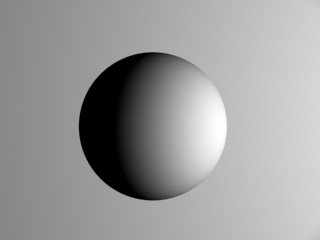
Lets consider this sphere is a really small bump on a wall. Now notice
as we move the light, more and more of the sphere is appearing darker.
This is the same reason why bumps become more pronounced as the light
moves to the side.
People who do photograph portraits know that if you place a light from
the side on
a person's face, and have tight, harsh shadows, they tend to look
older. This
is because the principal above accentuates the wrinkles and pores on
the person's skin. So to reduce that phenomena, the person lighting the
scene places lights a little more at position 2 (position 1 tends to
flatten out the face and is also undesirable), and use a more diffused
light. You can also use this
principal to make a rocky surface look even more rocky, or a flat wall
feel richer with surface detail by placing the light closer to the
glancing angle.
So even though we have the power to artificially increase the bumpyness
of a surface in cg, to get something that looks more convincing, you
may want to consider the way lighting is done in the real world and
move your lights rather than changing your bump maps to an unreasonable
level. Just another trick in the bag.