Glows That Look Really Hot
By Neil Blevins
Created On: Oct 12th 2009
Software: Any
Go here
to read this tutorial in Russian.
How do you make glows that look really really hot? The intuitive
answer says, keep adding white. But in fact, that will probably not get
you the result you're looking for. Part of the problem is the fact that
monitors can only display colors between black and white. In the real
world, a really bright object (say the sun) is thousands of times
brighter than white. But our monitors can't produce a brightness higher
than 1, even if you have an hdr image, the data of your image might be
brighter than white, but it still displays on a monitor that can't
produce these sorts of brightness'.
There are a couple of tricks to make a glow in your image really pop
out as a bright light source...
- Contrast
- A Saturated Color around the Glow
- Wrap-Around Glow
- Non-Linear Falloff
Contrast
This one is pretty straight forward. If you want your brights to
look
brighter, make everything else darker. So it's not about brightening
your glow, as much as it is how bright is it compared to everything
else. Notice how the white looks
whiter as you go further to the right, even though it's the exact same
brightness each time. The only difference is the darkness of the
background...

Saturated Color Around A Glow
This phenomena happens in photos, when you have a really hot colored
glow, the center will be white, but then the edge of the glow will fade
to a highly saturated copy of the color your light source is. This can
be done in photoshop pretty easily. Start with a white brush, and
paint your white center. Then switch to a saturated color, and set your
brush to "Linear Dodge (Add)" mode. Then paint on top.

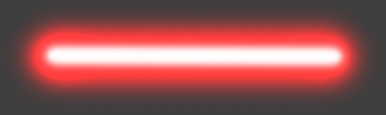
You can also paint the red on a separate layer above your white
layer and set the
layer to "Linear Dodge (Add)" mode.
In Corel's Painter, this is done using the glow brush, which is
basically doing the exact same thing described above. It's just done in
a single brush.
Wrap Around Glow
So when a glowing object is in front of a occluding object, the
brightness will tend to bleed around the edge of the occluding object.
Take a look at this lamp.

Notice how the glow wraps around the edge of the lamp. Also, notice how
as the glow dissipates, you see a subtle red color (which is the
Saturated glow phenomena described earlier).
Non-Linear Falloff
The normal Photoshop brush falloff can be a bit boring. Lets take
the standard Photoshop soft brush, and bring it's opacity to 10%. Now
press the mouse once, you get this...

Press it multiple times, and you get this...
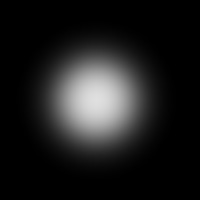
While I have seen some real glows with this sort of falloff, in
general, I tend to see falloffs more similar to this...
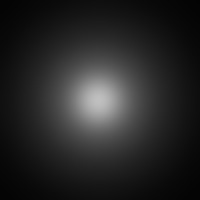
Some paint programs have ways to modify the falloff of your brush,
there's no easy way to do this in photoshop, so what I tend to do is
this. Take the round brush, make it large, set it to 10% opacity. Press
the
left mouse button twice. Then make the brush smaller by hitting the "["
key twice. Now press the left mouse button again twice. Now make it
smaller again by pressing the "[" key twice. Press the left mouse
button twice. Keep repeating till your brush gets quite small. The
result may also need a slight Gaussian Blur, so do it on a separate
layer.
It's more work, but I feel the falloff looks a lot nicer.
Practical Example
Lets say you want to paint a sunset. Lets start with 3 simple
layers, a sky gradient, a ground, and your sun, which is a perfectly
white circle. So this really doesn't look too hot yet.
Lets add a saturated orange color around the edge of the sun. I start
with a largish soft brush set to orange, and paint on a layer below the
sun...
Next I make my brush a bit smaller and paint a whitish circle...

Now I make my brush a bit smaller and paint with white again...
So this combines both the Saturated Color technique and the Non-Linear
Falloff technique.
Now lets move onto the wrap around glow. First we'll start with a very
sharp white wrap-around only at the very edge, I paint on a layer above
the ground...
Now we want to make a larger glow on the ground, which will also be
saturated. I start with a smallish round soft brush and paint red at a
medium opacity. I set the layer to "Linear Dodge (Add)"...
I then make my brush larger, and reduce it's opacity, and paint some
more...
I then make my brush way larger, and reduce it's opacity again. And do
one final strokes...
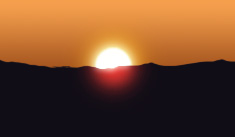
So this combines all 4 techniques. First, it's showing off Contrast,
since it's a bright color against black. Second, it's showing off
Saturated Color around the glow, the color red. Third, it shows
Wrap-Around Glow, since it's wrapping around the edge of the ground.
And fourth, it shows a Non-Linear Falloff, since I paint the glow using
progressively smaller and smaller brushes with each brush stroke.
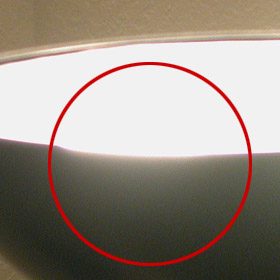
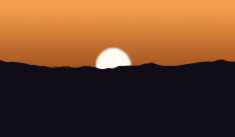
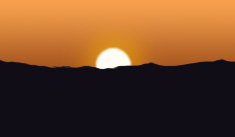
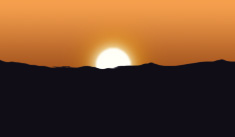
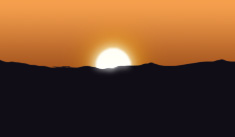
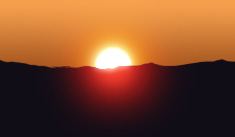
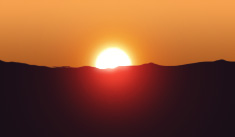
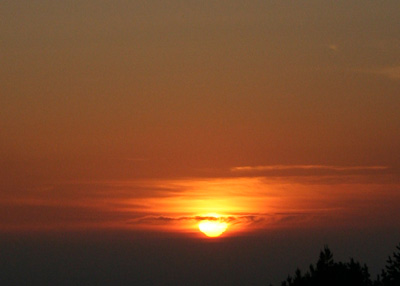
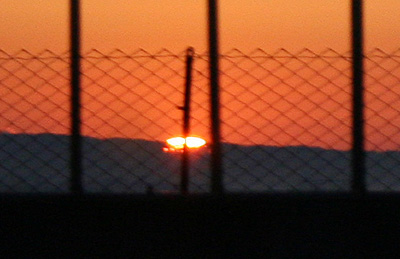
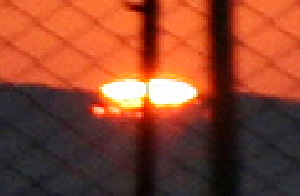
Real World Examples
And here's a few real photos showing similar results...
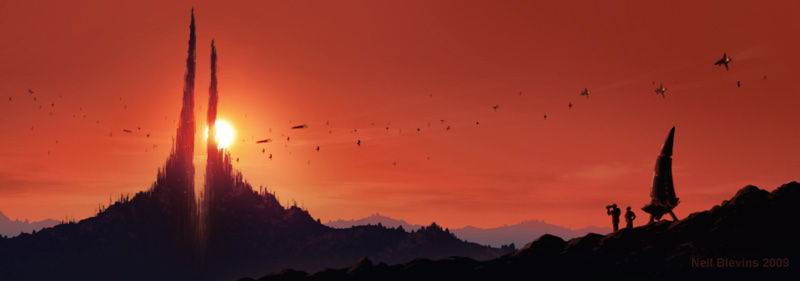
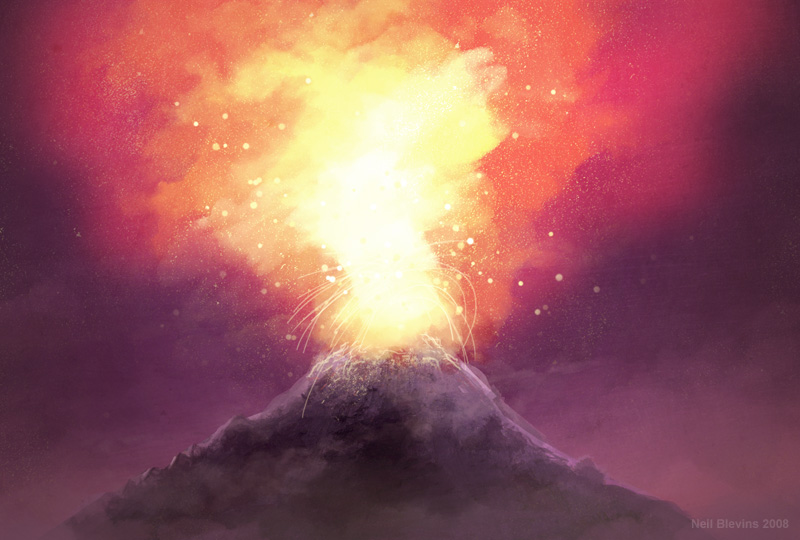
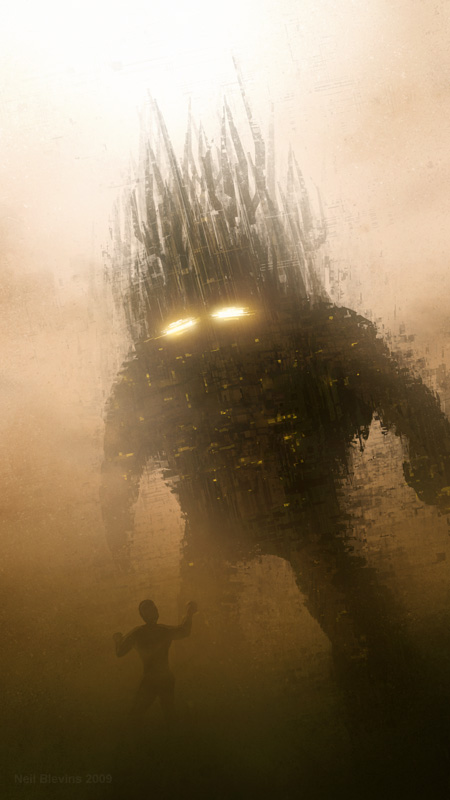
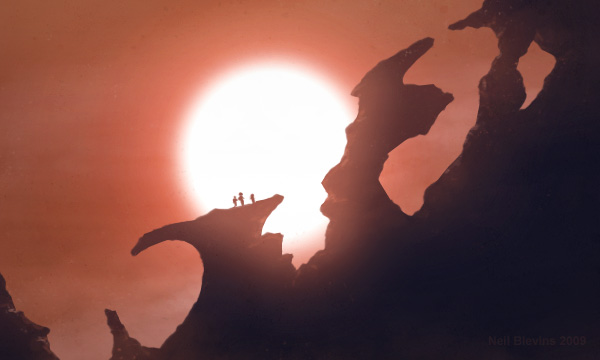
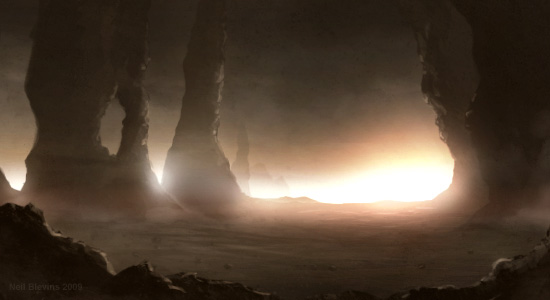
My Paintings
And here's a few of my paintings where I use these techniques...
This site is ©2026 by Neil Blevins, All rights
are reserved.
To see hundreds of other tutorials similar to this one, visit the
Neil Blevins Education Site