Rounding The Edges: Chamfers And Fillets In 3dsmax
By Neil Blevins
Created On: May 17th 2005
Updated On: Dec 10th 2024
Software: 3dsmax
Go here
to read this tutorial in Russian.
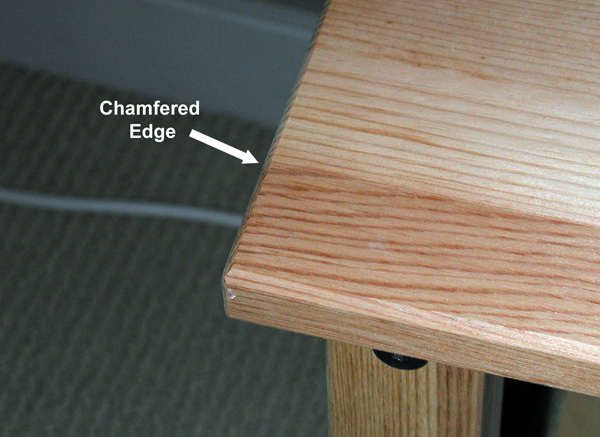
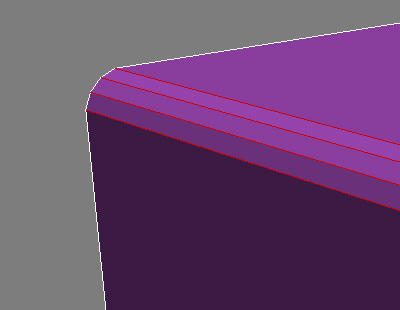
What is a chamfer and fillet? In the pristine world
of computer graphics, you have hard edges. When you make a cube, you
get
a sharp edge, when in real life, almost everything has a rounded edge,
even if just ever so slightly. Take a look at the table below. On
closer inspection, that hard edge you saw from across the room is
actually chamfered. So
if you want your cg to look more
believable, getting those hard edges rounded is a must, it can make
your work more realistic and more visually rich, since rounded
edges can help pick up highlights that are otherwise unattainable by
mathematically perfect corners.
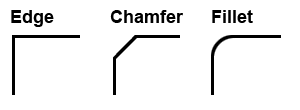
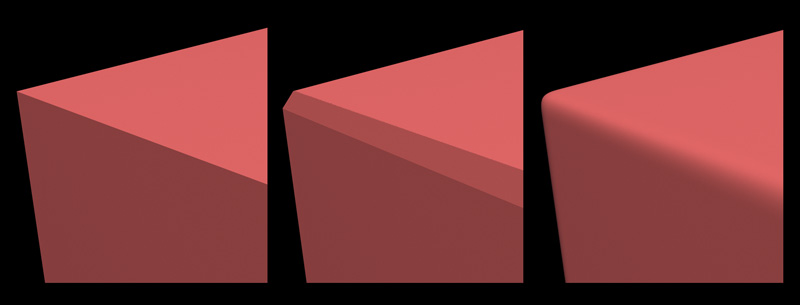
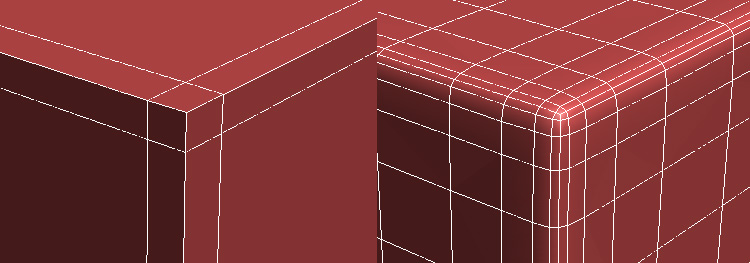
A Chamfer is when you take an edge and cut it at a 45 degree angle.
A Fillet is similar, but fully rounds off the edge. Take a peak at the
diagrams below.
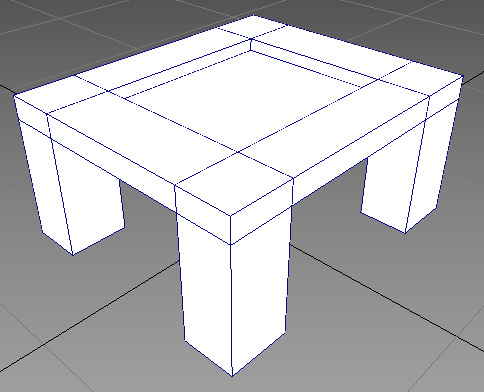
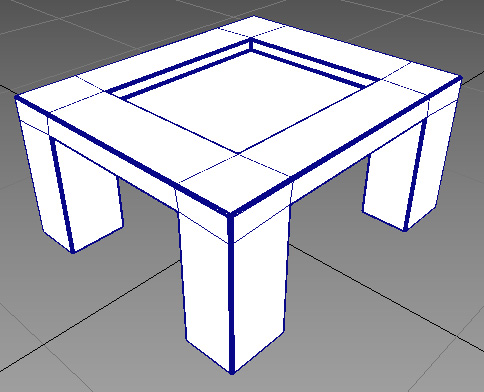
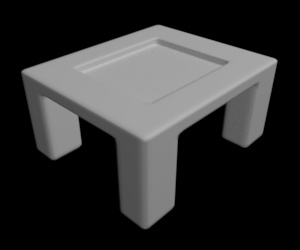
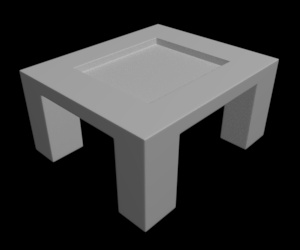
Our Base Poly Model
Here's our base model, all straight polygonal edges. You
can download the model here in obj
format.
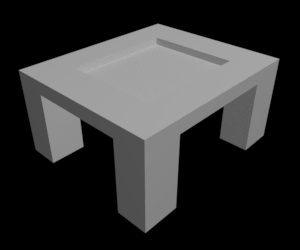
50 faces
We
will now show a number of different methods to round the corners of
your geometry.
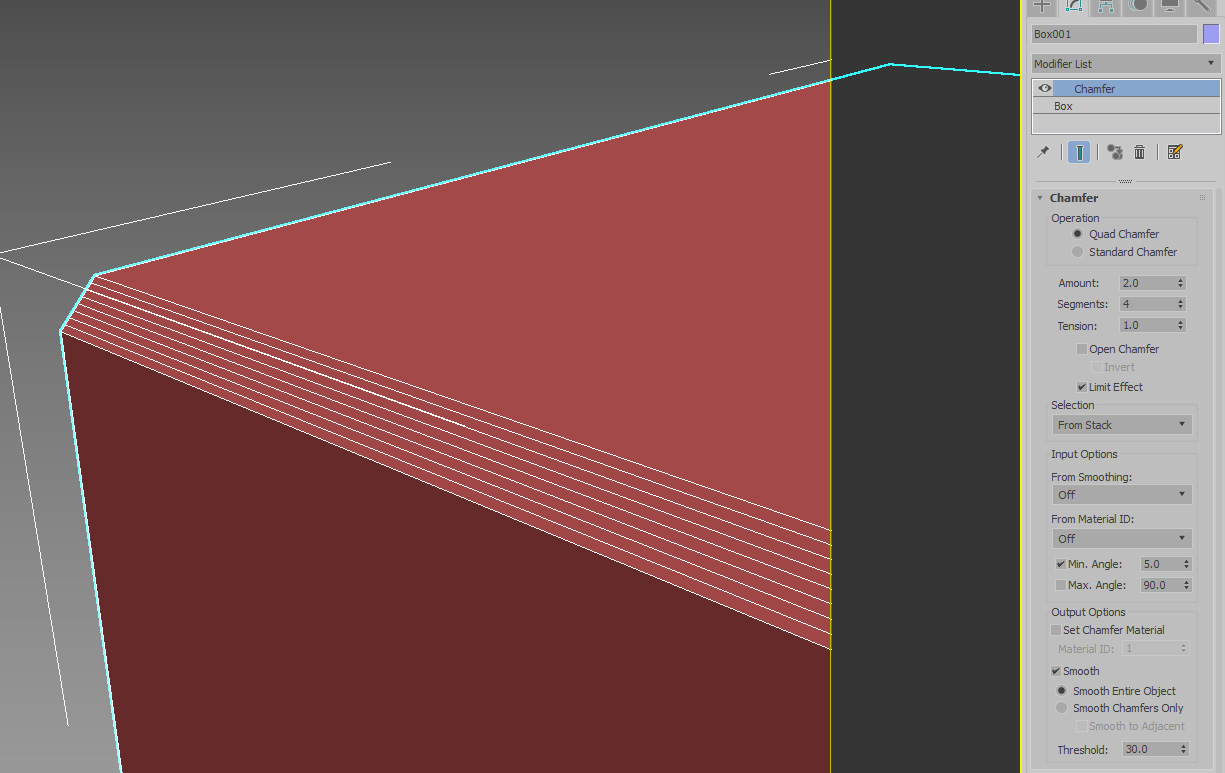
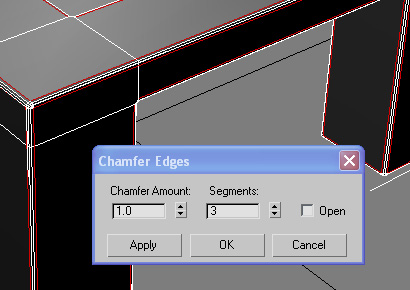
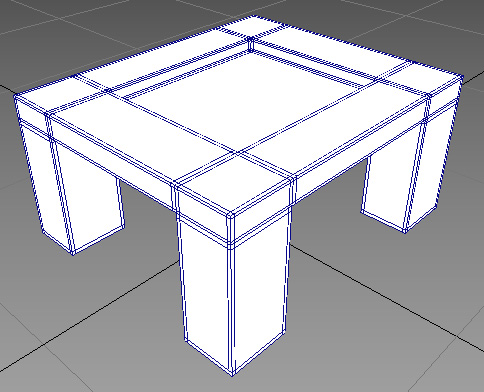
Chamfer
Modifier for
Chamfers
First lets use 3dsmax's chamfering feature inside of the Chamfer
Modifier (you can also use the same feature in the Edit Poly Modifier,
Edit Mesh Modifier or Editable Poly). Apply a chamfer modifier to the
object.

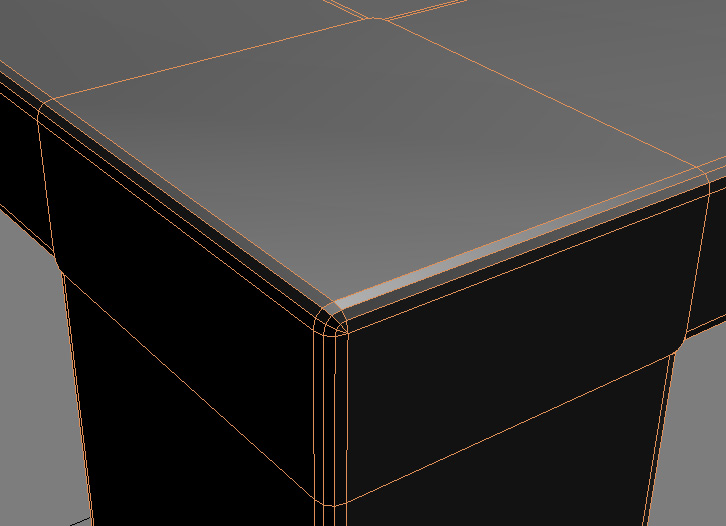
324 faces
So this looks much better than the original mesh, notice the tiny
highlights you're getting on those edges, it makes your model far more
realistic and visually interesting. Unfortunately, the polycount has
gone from 50 faces to 324 faces.

However, since I performed the chamfer with a modifier, I can turn off
the chamfering if the object is far away enough from the camera that
you won't see it, or I can set the modifier to only calculate at
rendertime, which will make the viewport polycount less expensive.
Also, if I need to change the underlying geometry, I can do so and the
modifier will just chamfer the new geometry without any further hand
editing. This is a really powerful feature of 3dsmax's modifier stack.
Chamfer Modifer for
Fillets
The Chamfer modifier also allows you to do flllets instead of just
chamfers. Just change the "Segments" spinner to a number above 1...
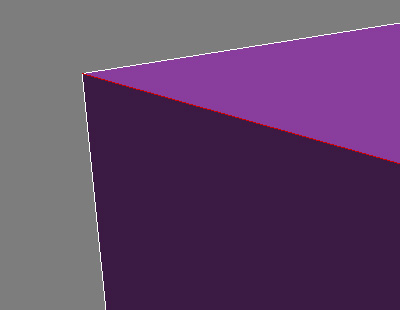
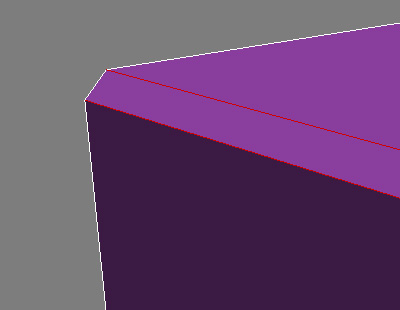
Here's the same thing done inside an Edit Poly modifier.
Here's a closer look at the results...
And here's the render...

1562 faces (3 segement Chamfer)
While a nicer smooth edge, if you're planing on getting really close,
it may not be worth it, as it doesn't add too much extra detail that
the regular chamfer modifier with 0 segments adds.
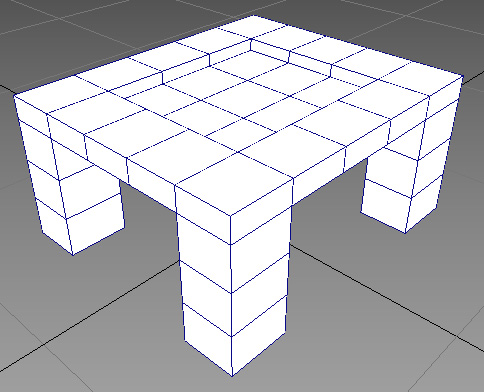
OpenSubdiv With Creases for Fillets
Another great way to get fillets is in 3dsmax's Opensubdiv
modifier with Creases. You can see it in action in the tutorial OpenSubdiv
in 3ds Max.
130 faces in view, 8320 faces at render
It creates nice fillet edges, but increase polycount a lot. This is due
to two things. The
viewport count has gone up from 50 to 130 faces because to get rounded
edges using this
technique, you need to place extra geometry to make the faces more
square. Opensubdiv works best on meshes who have squares for faces
instead of long rectangles. Here's a snapshot of
the extra geometry I had to add.
The other reason it increases facecount a lot is in 3dsmax, subdivs are
calculated as distinct steps. Other renderers can calculate
the subdiv at rendertime, and only add as much geometry as needed to
get the resulting surface. So if the object is far from the camera it
will smooth less, and large flat areas will not smooth as much as the
edges. In 3dsmax, flat areas that don't need to be subdivided will be
by the same amount as the edges.
So you get much nicer rounded edges, but at the cost of extra geometry.
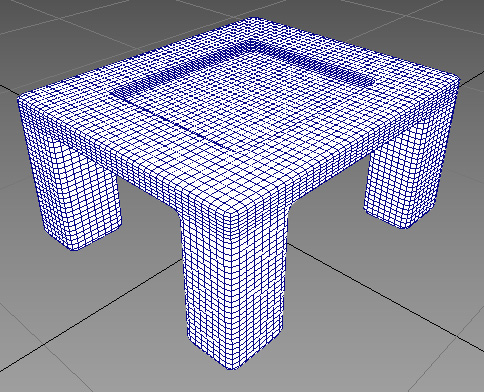
OpenSubdiv With Support Edges for
Fillets
You can see this technique in action in the tutorial Subdivision
Surfaces Using
Support Edges.

450 faces in view, 28800 faces at render
Creates nice fillet edges, but increase polycount a ton. Here's the
wirewframe of the base mesh with support edges added...
And here it is with the subdiv applied...

Really dense edges. But also looks the best, so the choice is yours.
Meshsmooth and Turbosmooth
for Chamfers
Max still has Meshsmooth and Turbosmooth, two older smoothing
algorithms. But I don't recommend using them, while they're less memory
intensive than opensubdiv, they don't allow for proper creasing and
produce results that are incompatible with other subdiv algorithms in
other software packages, making your models only usable in max.
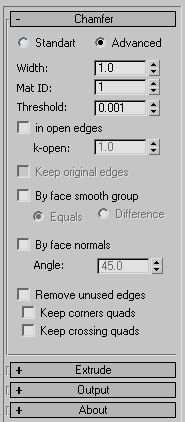
Opensubdiv with EdgeChEx for
Fillets
This is very similar to the Opensubdiv with Support
Edges technique, except you use the EdgeChEx modifier plugin to create
the extra loops instead of creating them manually. You can grab the
plugin here.
Take your mesh, apply the modifier, then apply the Opensubdiv modifier.
You may need to tweak the parameters of the modifier a bit, or even
collapse it into the editable poly and then adjust a few of the edges
it creates, but it's a lot faster than adding all that extra geometry
by hand. Here's the resulting render...
450 faces in view, 28800 faces at render
And here's a peak at some of the parameters of the plugin.
Conclusion
Hopefully this gives you many
options to chamfer or fillet your model!
This site is ©2026 by Neil Blevins, All rights
are reserved.
To see hundreds of other tutorials similar to this one, visit the
Neil Blevins Education Site