Scattering Objects By Neil Blevins Created On: Mar 14th 2009 Updated On: Apr 5th 2026 Software: Blender or 3dsmax
When making environments, a common task is to scatter hundreds if not
thousands of props into a scene, whether it's bits of garbage into a
post apolcalyptic building, or trees and plants on a beautiful
landscape. This tutorial talks about how to do this procedurally inside
of your favorite 3d applications, automating much of the process so you
can focus on placing the hero objects, and let the algorithm take care
of the lesser important background scatter.
Blender Examples
Scattering in
Blender is most often accomplished using Geomertry Nodes. Here's an example file of a
simple scatter, placing 3
different scatter objects randomly onto a floor: Scatter_GeometryNodes_Basic.zip
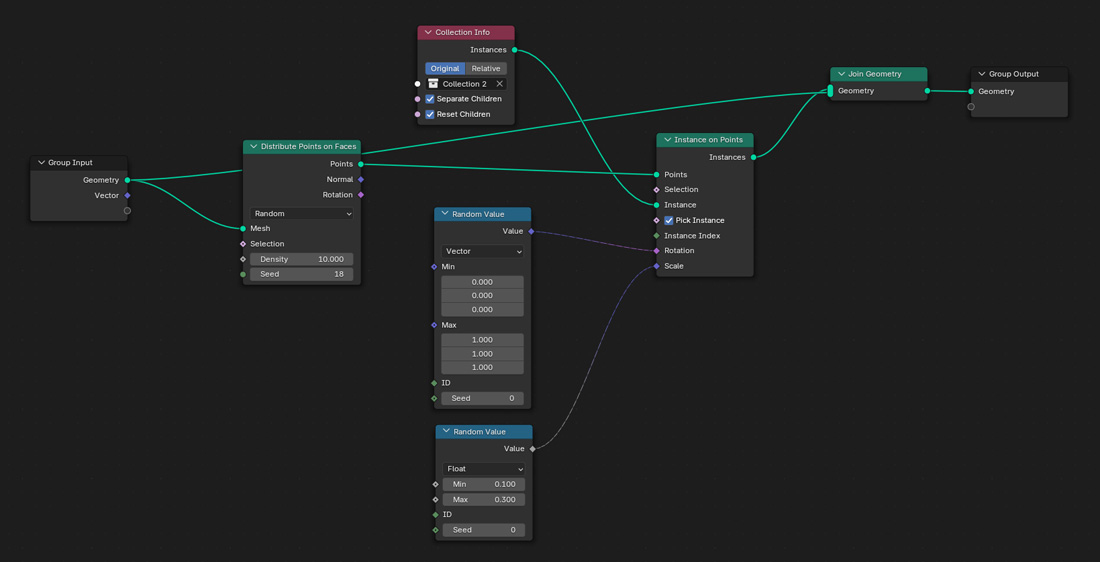
Here a basic walthrough of how the example file was made:
Create 3 objects (Cube, UV Sphere, Cone)
Put the 3 objects into a Collection
Create Grid, 50x50 subdivs, 100m size
Select grid
Object > Apply > Rotation And Scale (otherwise you will see
very odd results)
Switch to geometry node mode
Click “New”
Add node “Distribute Points On Faces”
Add node “Instances On Points”
Add node “Join Geometry”
Hook “Group Input / Geometry output” to “Join Geometry / Geometry
Input”. Hook “Join Geometry / Output” to “Group Output / Geometry”.
This keeps the ground in your scene.
Hook “Group Input / Geometry output” to “Distribute Points On
Faces / Mesh”. Hook “Distribute Points On Faces / Points” to “Instances
Of Points / Points”.
Hook “Instances Of Points / Instances” to “Join Geometry /
Geometry”Hook Group Input / Geometry output to Join Geometry / Geometry
Input.
Drop Collection into graph
connect Collection Info / Instances to Instances On Points /
Instance
On Collection Info node, check “Separate Children” and “Reset
Children”
On Instances On Points node, check “Pick Instance”
Add node “Random Value”, set the node to “Vector”
Hook Random Value / Value to Instances On Points / Rotation
Add second “Random Value” node, keep the node on Float (keeping
it on float will keep the scale uniform)
Hook second Random Value / Value to Instances On Points / Scale
On second Random Value node, set min to 0.5 and max to 1.5
Play with Distributed Points On Faces / Density
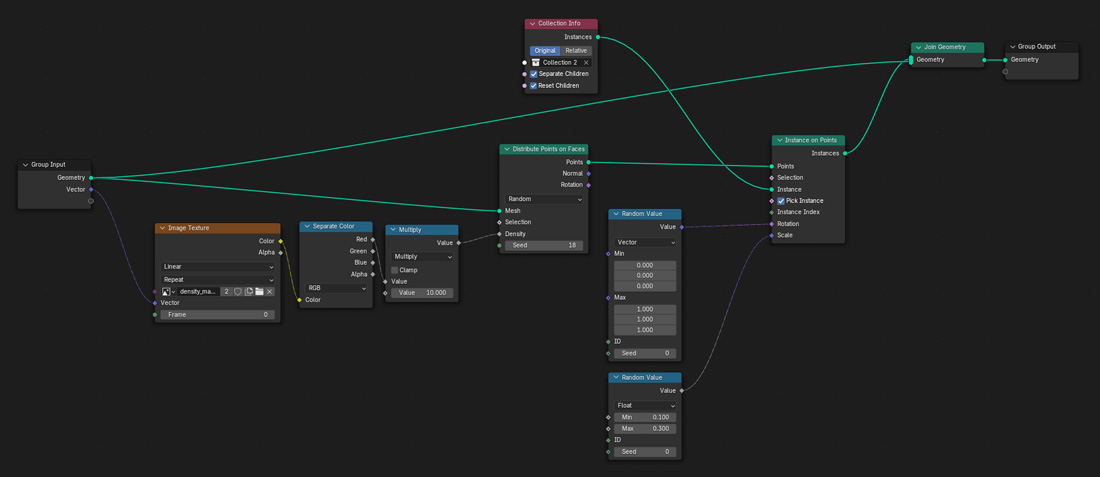
Here's an example
file showing how to Paint Object Density onto the surface,
controlling how many scatter objects get placed on a surface using any
texture map: Scatter_GeometryNodes_DensityByImage.zip
Here a basic walthrough of how the example file was made:
Start with the instructions for the basic example.
Add Node “Image Texture”
Add Node “Separate Color”
Add Node “Multiply”
Hook “Image Texture / Color” to “Separate Color / Color”
Hook “Separate Color / Red” to “Multiply / Value 1”
Hook “Multiply / Value” to “Distribute Points On Faces / Density”
Add a bitmap to the Image Texture node (or do Texture Painting).
White adds full density, gray adds partial density, black low density
Hook “Image Texture / Vector” to the “Group Input / empty
socket”, this will automatically create a “Vector” socket.
In the modifier tab, click the Input Attribute Toggle once,
instead of a vector, the vector will now be a text entry field. In the
field, click once, and pick the UVs of your Grid.
Adjust Value 2 of Multiply node to control overall Density.
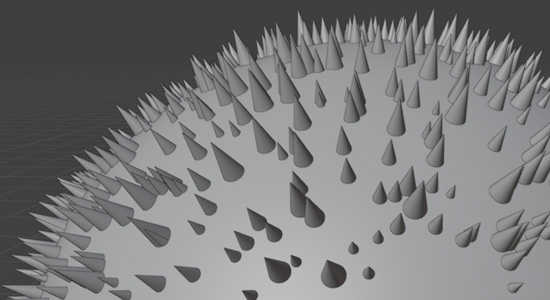
Here's an example
file showing how to Align the Scatter Objects to the Surface of a more
complex object, so the objects are always pointing
outwards from your base surface: Scatter_GeometryNodes_AlignToSurface.zip
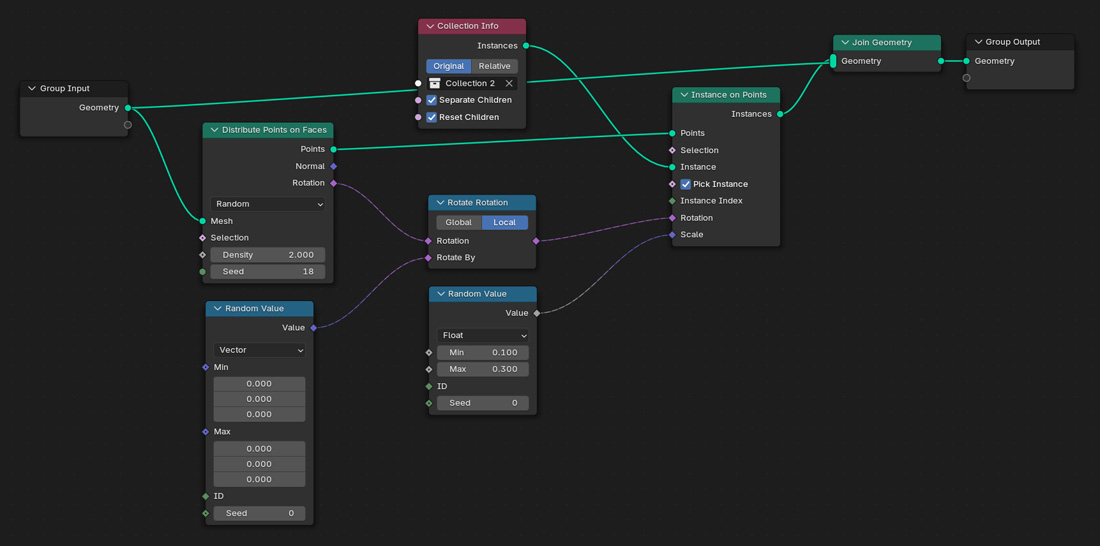
Here a basic walthrough of how the example file was made:
Start with the instructions for the basic example.
Add Node “Rotate Rotation”, set to Local
Add Node “Random Value”, set to Vector
Hook “Distribute Points On Faces / Rotation” to “Rotate Rotation
/ Rotation”
Hook “Random Value / Value” to “Rotate Rotation / Rotate By”
Hook “Rotate Rotation / Output” to “Instance on points / Rotation”
Random Value Node controls random rotation, keep at 0,0,0 to have
the objects aligned with no randomization
3dsmax Example
In 3dsmax, there are a number of techniques including the
Scatter Compound Object. Sadly, the Scatter
Compound Object hasn't been updated since max 4 or 5, so if you
want to do things like multiple scatter objects, scatter by
distribution map, etc, you should use the Pflow particle system
instead. It far more time consuming to setup, but once you
do, it has a lot of useful options.
Please note, Pflow sadly doesn't have all of the options that scatter
does either, like controllable random rotations, so Pflow can't
completely replace scatter, but it can in many situations.
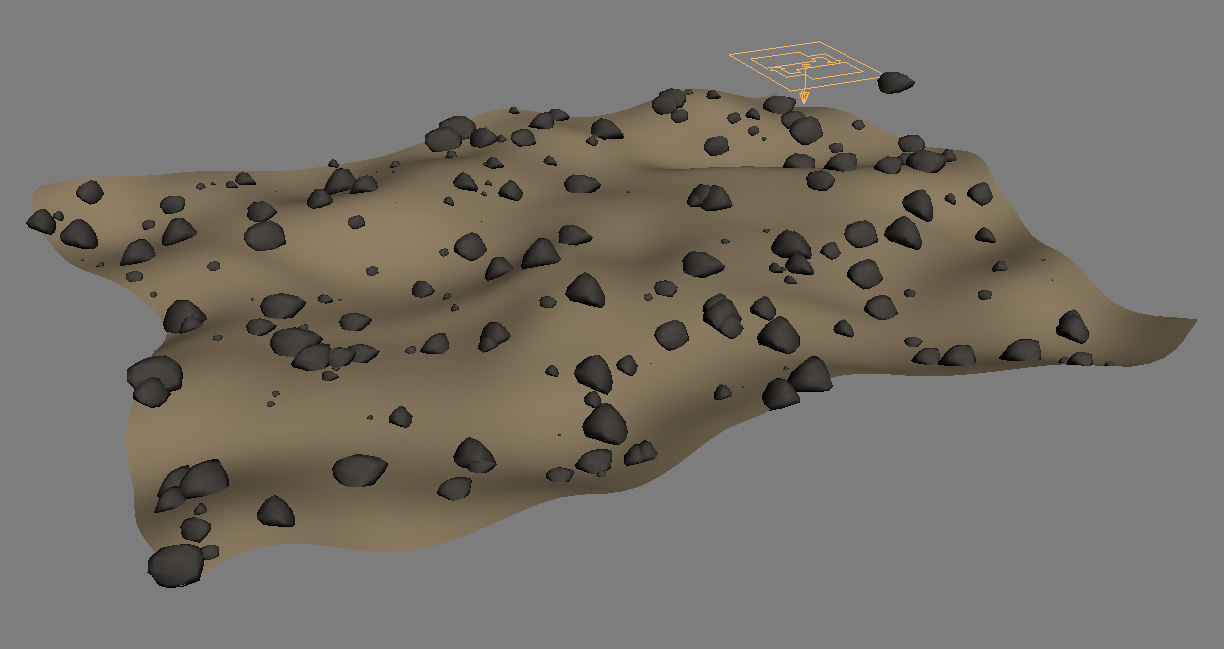
Here's the result I'm going for, a bunch of rocks on a landscape.
Notice the Pflow icon on the upper right of the screen, for your final
scene, you would just hide this to get it out of the way.
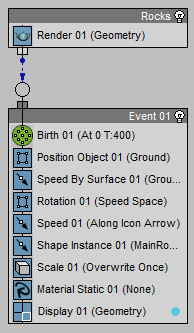
To make this model, start with a ground object and a rock object. Now
create a Pflow emitter anywhere in the scene. This is what the pflow
graph will look like once you're done...
So first create a graph that looks like the one above, placing and
removing operators as needed (an operator is, for example, a Birth
Operator, A Speed By Surface Operator, etc). Then go into
each Operator and set them like below.
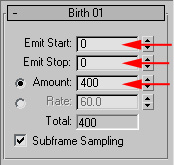
Have it start and stop particle emission on the first frame. Amount is
the number of rocks you want scattered.
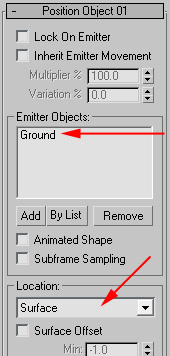
Choose your ground as your emitter object. Location is set to Surface,
so the particles emit at the surface.
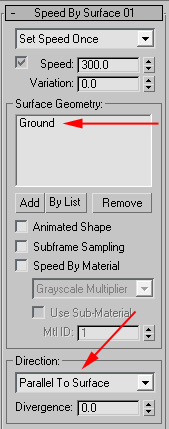
Choose the Ground as your surface geometry, and have direction be
"Parallel To Surface".
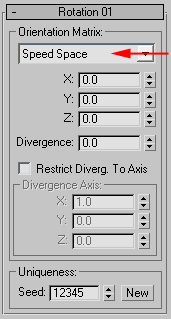
Now set rotation to Speed Space. This will align your objects to the
surface normal of your emitter object. Play around with the Axis amount
(if necessary)
to get the orientation of your rocks to look the way you want them.
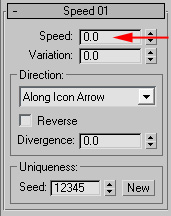
Now, since we don't actually want the particles to move, we just gave
them a speed in order to align them to the surface, we now set the
speed to 0 so they don't animate.
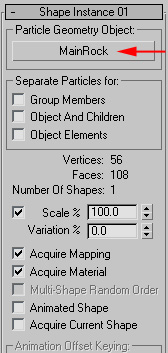
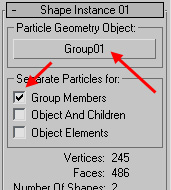
The Shape Instance we want to use is our Rock shape. If "Acquire
Material"
is selected, your rock objects will have the same material as your
original rock.
Also, if you want to put multiple different types of rocks on the
ground, take your Rock objects, group them, and then select the Group
as your "Particle Geometry Object", and check the "Group Members"
checkbox to have it randomly choose one of the group members for each
particle.
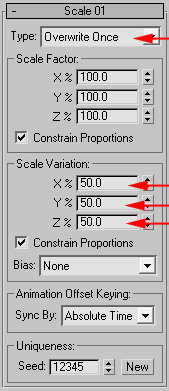
Set the Scale like above to give each rock a slightly random size.
The Material Static operator isn't necessary, since the rocks already
have their
material, but if you want something a little more complex like
assigning random Mat IDs to your rocks to give them variety, this
operator will let you do that.
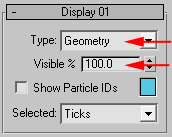
Finally, set Display as Geometry, and Visible at 100% so you can see
the placement of all your rocks. Feel free to make the display number
smaller if you have a lot of rocks, and don't need to see where they
all are.
Now you have something that can replace the scatter compound object in
many situations.
And it has a lot of extra features that can make it useful. If you
later want to convert your particles into an actual mesh, use the
mesher
compound object, which lets you converts particles to real geometry.