So lets say you have a model all setup for the Arnold renderer in
3dsmax, and you've used an Arnold specific map inside your material.
Now you want to either render your model in a different renderer, or
another 3d app entirely (like Blender or Unreal Engine), and of course
it doesn't have the Arnold specific map available. No problem. Time to
use Texture Baking in 3dsmax. Texture Baking allows you to take any map
or map chain and bake it into
a series of texture maps. This can be used to speed up slower to render
maps, or to use maps in an incompatible renderer, or any number of
other uses. Think of texture baking as a way to take one method for
placing your texture onto a surface and transfer it to a new placement
method.
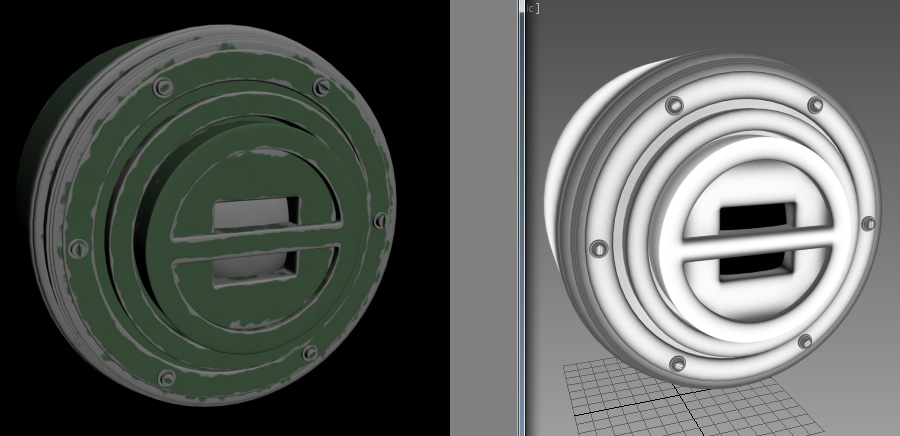
So for this tutorial, lets start with a mesh and apply a texture
chain that includes an Arnold specific map.
Now to succesfully transfer it, let's do a texture bake.
For this tutorial, you'll need my Soulburn
Script pack, as you'll be using the texmapBaker Script.
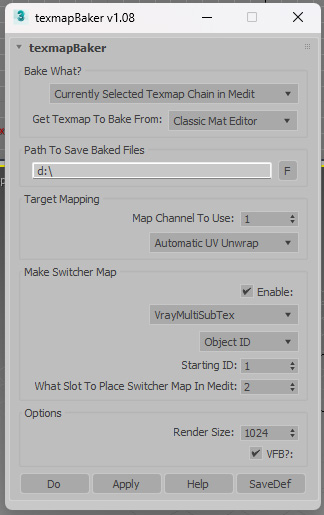
4) Choose the path you want to bake to (this will write out one
bitmap per object into this path, each file named after the object.)
5) Since my objects don't already have UVs, I'm choosing Automatic UV
Unwrap
6) Turn on Map Switcher, set to VrayMuliSubTex (since we're going
to render the final result in vray)
7) Hit Apply.
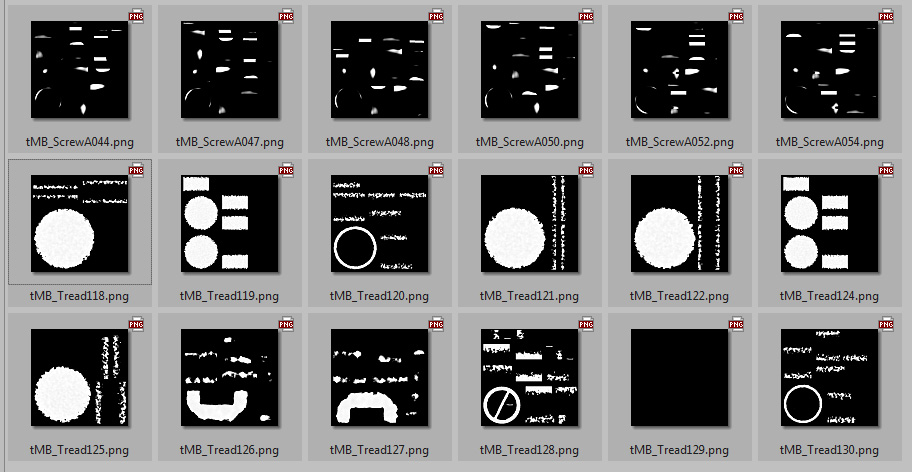
8) You'll now have a series of texture written out to that directory...
9) You also now have in slot 2 of your Material Editor a vray
VrayMultiSubTex map that's pointing to all of these maps...
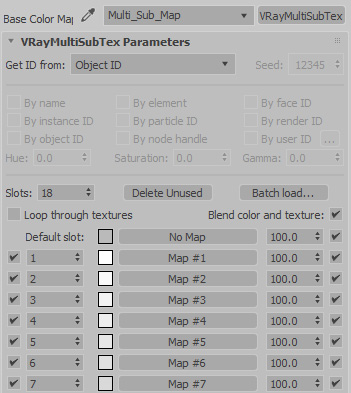
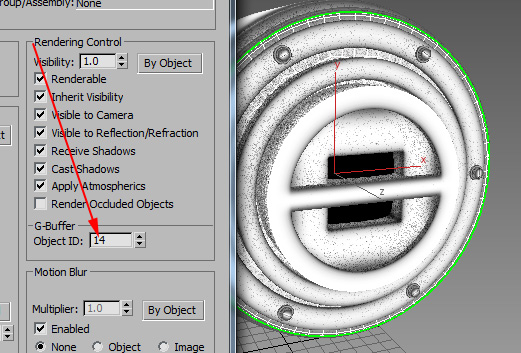
10) And if you check out your objects, they each have an Object ID
that's been set to match the maps and their place in the Multi-Map...
11) Now replace the incomatible map in your map chain with your
newly created Multi-Map.
12) Change renderer to vray, and hit render
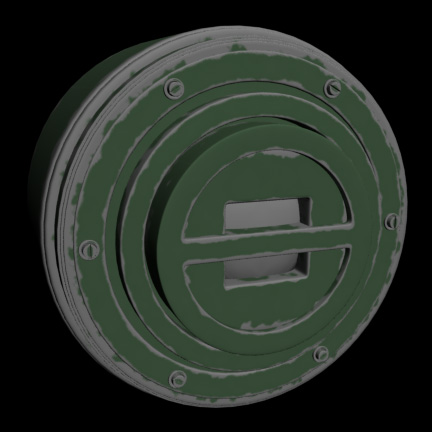
There you go, you can now use any map inside of vray.
There are some disadvantages of this technique:
For more information on which Switcher map to use and which ID type to choose, read my lesson on Switchers And IDs, Which To Use When.
Anyways, hope that helps show an example of where Texture Baking can be useful for your workflow.