An object like a towel is made up of thousands of little fibers, all
packed closely together. To replicate this is cg, the obvious solution
is to use a hair system to produce those fibers. The results will look
good, especially close up, but that technique is perhaps overkill,
especially if the object is off in the distance. Hair can be expensive
to render, and time consuming to set up. So this tutorial
explains a method to do objects such as Towels, Carpets or Grass using
displacement.
I'll use the example of a towel, here, but the same thing applies to
Carpets or Grass. Also, while I'll use Mentalray for max in this
example, the same technique applies to any renderer that lets you use
displacement (if you don't have displacement, even a bump map using the
same technique will give good results as long as the camera is far
enough away).
The basic ingredients for a towel are as follows:
Color: Whatever color, for this example I'm picking a light blue.
Displacement: Very small speckly noise. Also for used towels, and
especially carpets, some larger areas are worn down, or the pattern is
brushed in a specific direction.
A photo of a real towel from a catalogue.
Making The Displacement Map
From far away, a towel looks like a bunch of chaotic bumps.
So one way to produce your displacement map is to make a lot of tiny
bumps using a small procedural noise.
Another idea is to use some sort of cellular noise for the pattern...
But for this example, I'm going to make a slightly more detailed
texture map in
photoshop. It will probably also render
faster than using the Noise or the Cellular Pattern.
Open photoshop, open a new document that's 1024x1024 pixels, and has a
black background color. Then get
the hard brush.
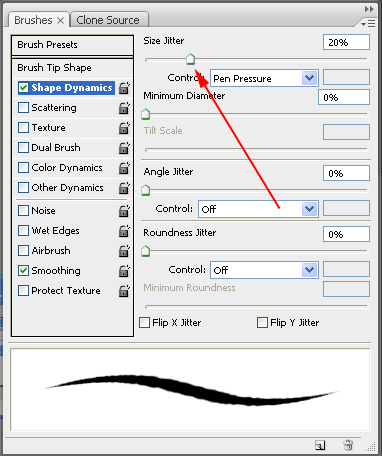
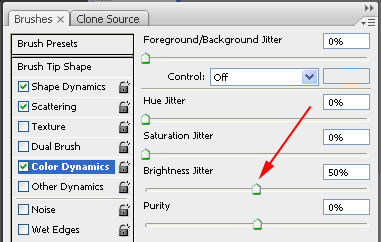
Modify the brush and give it a little size jitter
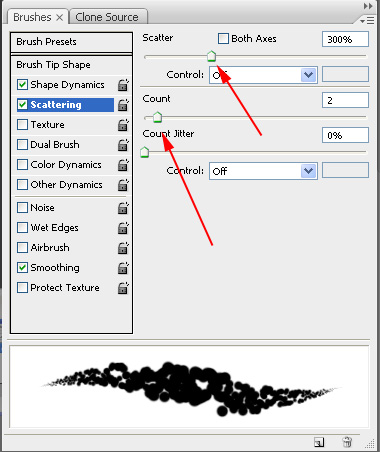
Give it a scatter and increase the count.
Under Color Dynamics, give it a brightness jitter. This will fake each
fiber of your towel being a slightly different height.
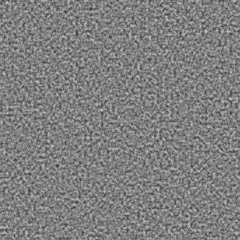
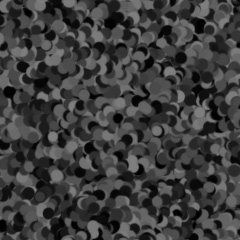
Now pick the color black and fill your image with the brush. Here's a
small cropped area of the bitmap.
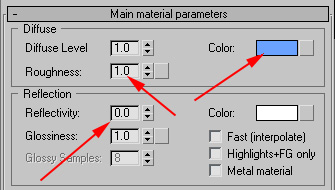
In max, choose the mentalray renderer. Choose an Arch & Design
material.
Change roughness to 1, since this is a rough material.
Make sure it has no reflectivity (which in mentalray stands for
specular reflectivity).
Give it a blue color
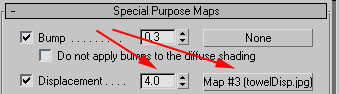
In Special Purpose Maps, add a bitmap under displacement, and set
displacement amount to 3. Choose your Towel Displacement map you
created in photoshop.
Setting Up The Renderer
Create a test object, in this case, I just created a plane and
used simple mesh editing techniques to make something that looks
vaguely like a towel.
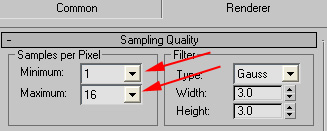
Set Your Min and Max Samples Per Pixel to a higher number, like 1
and 16. This will be necessary to get all those tiny details your
displacement will add.
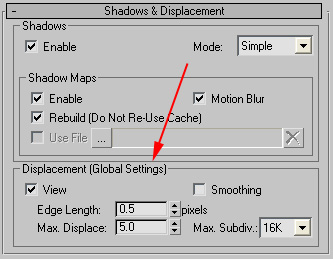
Under Shadows & Displacement, set the settings like below.
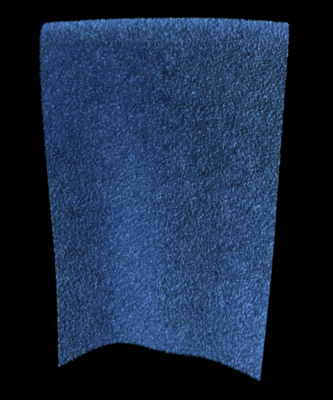
Hit render
And here's the result...
If you're getting something different on your own test object, make
sure that you're tiling the map a few times, so that the noisy pattern
is smaller.
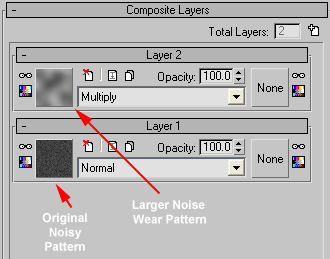
Looks good. But lets add that wear or brushed pattern.
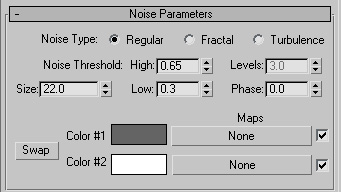
Turn your bitmap into a Composite Map, that contains both your original
bitmap,
and a larger noise. The larger noise is then multiplied onto your
original pattern, causing some areas to not be as strongly displaced as
others, hence creating a worn pattern.
Notice how the Larger Noise never goes to black, always to a medium
grey. This is to avoid any areas having no speckly displacement, or to
avoid any areas of 100% wear.
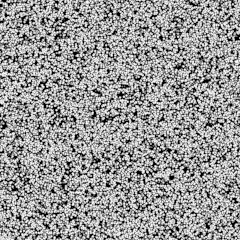
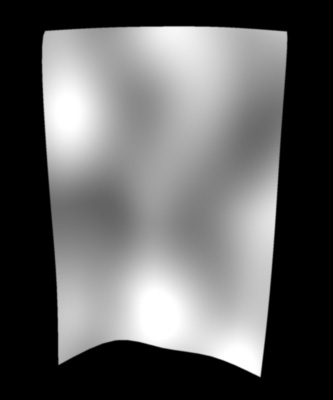
Here's the larger noise by itself.
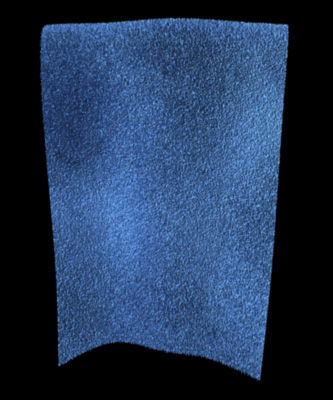
And here's the result of multiplying your original small noise by the
larger noise, this looks far more organic.....
Here's the max file, which contains both the
bitmap version, as well as versions using a cellular procedural map and
a noise procedural map. Requires Max 2009.