The following is a recipe for a chipped paint material. Old paint tends
to flake off, or gets chipped off by blunt objects hitting it. Adding a
little chipping to the paint in your model can add a lot of realism,
and gives your objects a sense of history. Afterall, it's not just the
dialog that provides the story, but every detail on every object.
Chipped paint lets the audience immediately know how old the object is,
or how often it's been used. I will use 3dsmax for this example, but as
always the theory works in any 3d app.
The basic ingredients for the material are as follows:
A base layer for the paint and undercoat to sit on (such as
plaster
or metal).
An undercoat layer. Many times you will paint down some
white "primer" on a surface before painting ontop of it with your final
paint.
Undercoat Color (whitish)
Areas that are chipped off revealing what's underneath
A layer of paint.
A paint color
A paint brush stroke bump
Areas that are chipped off revealing the undercoat and base
layer.
The edges of the chipped off areas are generally bumped up.
That's because when a chip
of paint falls off, water and moisture can creep into the wound,
causing the surrounding paint to bulge out.
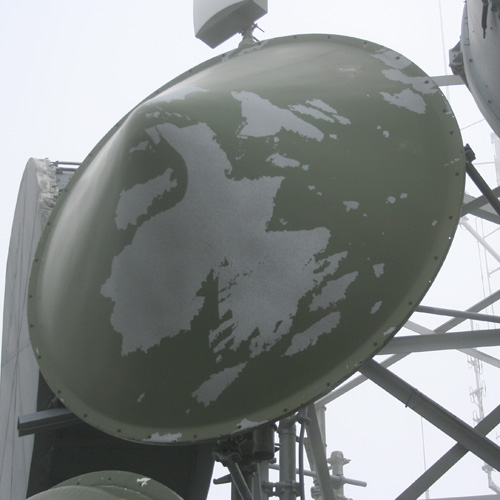
Check out these 3 photos. The first is some nice patterns of paint
chipped off a radio antenna.
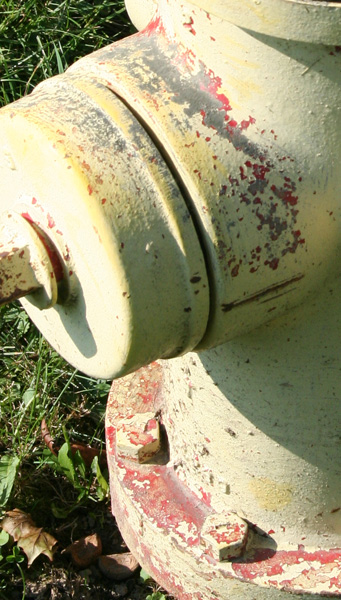
Here's some paint flaking off a fire hydrant, notice that the paint
flakes off to reveal an undercoating of other paint.
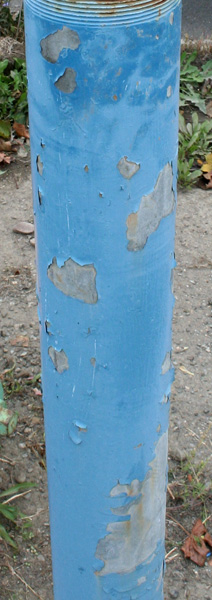
And here's a nice image showing the bulging that occurs around the
areas where the paint flakes off.
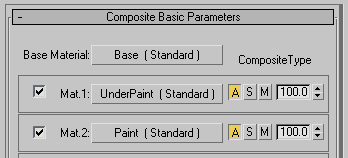
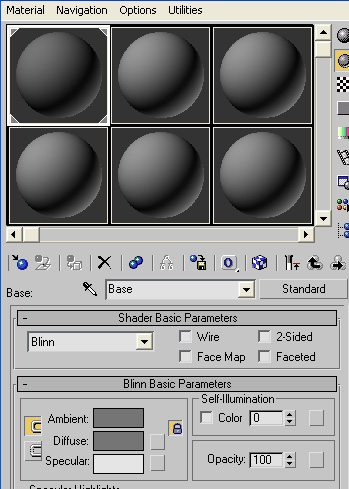
Composite Material
The first thing I do is set up a Composite Material (you can also use a
set of blends) so we can layer a bunch of other materials together. The
lowest layer is a Base material, Mat 1 is the UnderPaint material, Mat
2
is the Paint Layer.
Base Layer
The base layer is just a grey diffuse, feel free to spruce
this up to look like metal for example.
Underpaint Layer
The color of the underpaint material will be a slightly yellowish white.
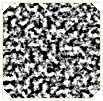
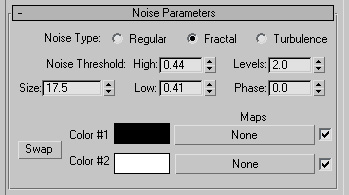
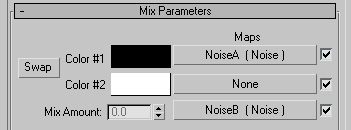
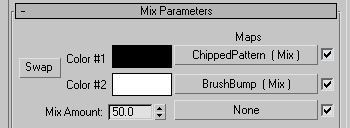
Now lets work on the chipped paint pattern. In a new material editor
slot, create a mix. This pattern
will be made up of two noises, masking each other. The first noise
looks
like this...
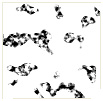
The second noise looks like this...
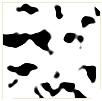
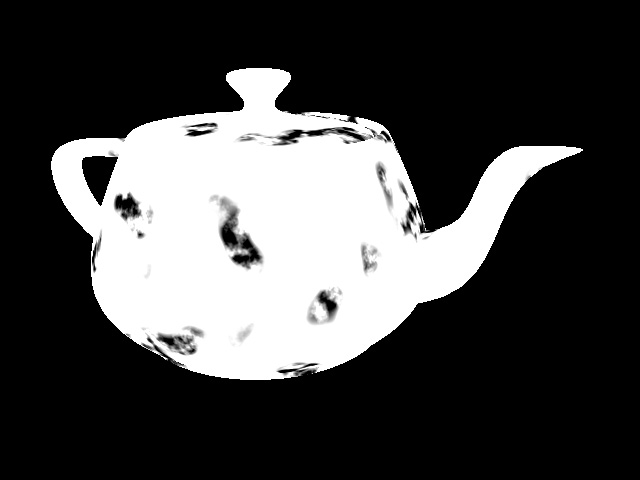
Combined, they form this pattern...
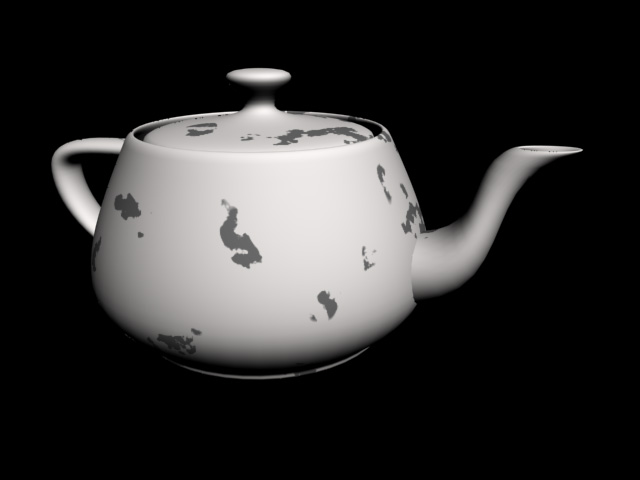
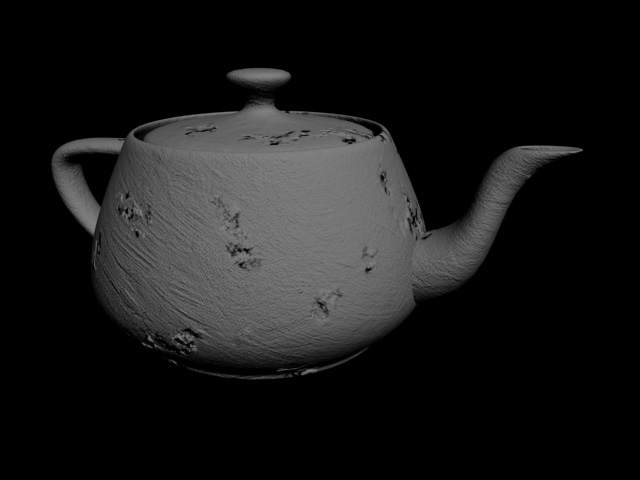
Here's the pattern on our test object.
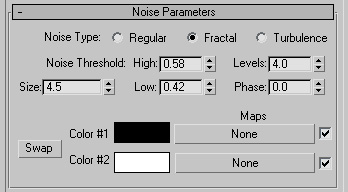
Next we're going to clamp this noise to make a sharper edge. First,
you'll need the free plugin ColorCorrect, which is available here.
In the opacity of your underpaint material, place the ColorCorrect map.
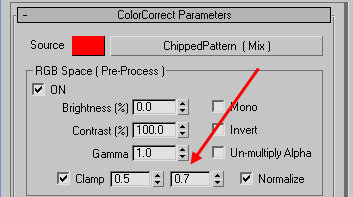
In the Source
map slot, place the "ChippedPattern" from above. Then set the Clamp to
0.5 and 0.7, and check "Normalize".
This is the result you get...
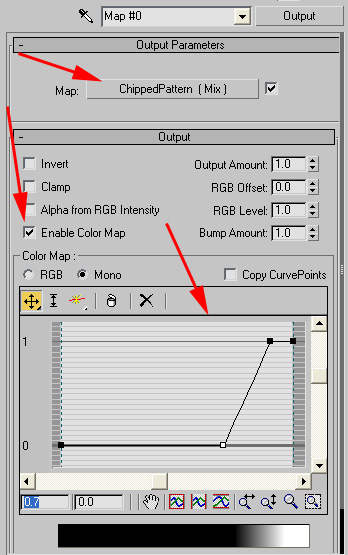
If you
don't want to use the ColorCorrect plugin, you can also do something
similar with
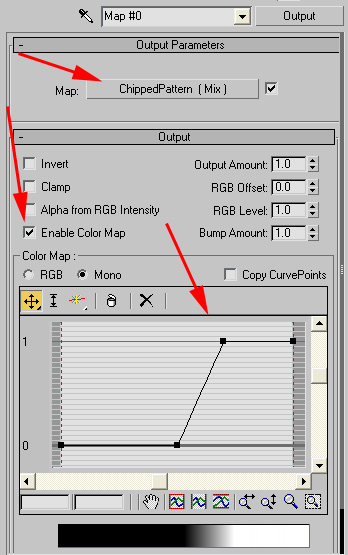
an Output map with it's Color Map adjusted. First, in the opacity of
your underpaint material, place an Output map.
In the Map: slot, place the "ChippedPattern" from above. Then check
"Enable Color Map" and modify your Color Map Graph to look like the
graph below...
This will give you the same results as the ColorCorrect example above,
personally I just prefer the ColorCorrect method because I need to
click less buttons to get my result.
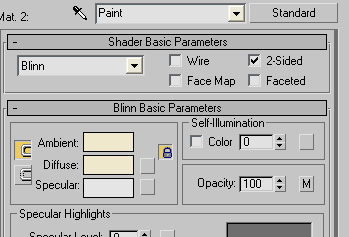
Paint Layer
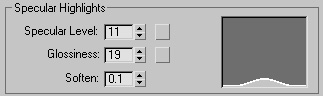
Now the paint layer. Add a slight specular highlight to your paint.
For the color, add a yellowish color (or whatever color you want your
paint to be).
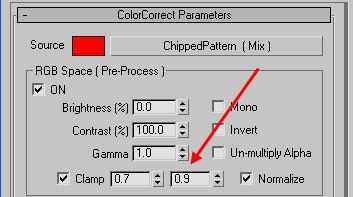
In the
Opacity slot place a new ColorCorrect, add the original Chipped Paint
pattern to the Source slot, and set the Clamp to a value of 0.7 and
0.9, and hit normalize.
Or if you want to use the Output map method, in the opacity slot place
a new Output map.
In the Map: slot, place the "ChippedPattern" from above. Then check
"Enable Color Map" and modify your Color Map Graph like this...
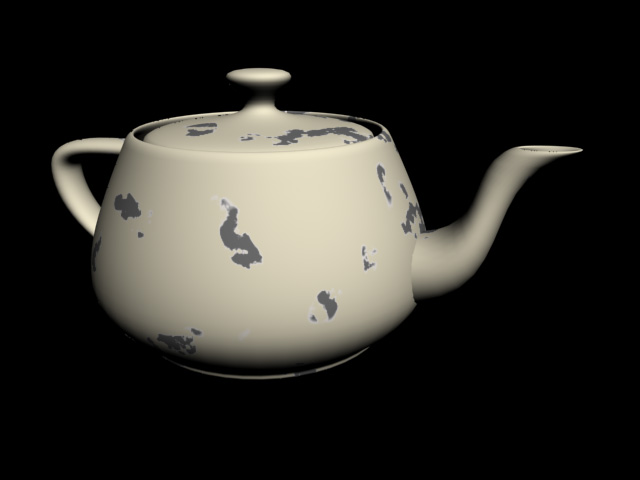
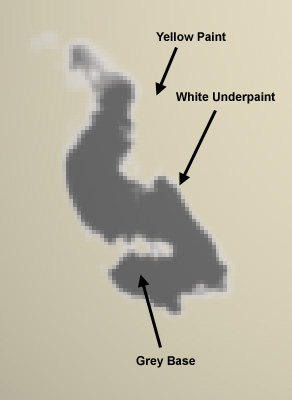
Here's the result showing all 3 materials layered together.
So here's the reason for the two ColorCorrects (or two Output maps).
You want a hole that
goes through both the paint and underpaint layer revealing the base
layer. However, the paint layer would chip off first, followed by the
underpaint layer. So you want to see a little bit of the underpaint
layer at the edges of the holes in the paint layer. So by using 2
ColorCorrects and clamping their values a little differently, you pull
a little of the white material into the chipped areas.
This is even more apparent when you have a darker paint color.
Ok, now lets add the bump. The bump will be a mixture of your
"ChippedPattern" map, and a brushed paint texture I created by scanning
real acrylic brush strokes...