Here's a trick to painting lumps, bumps, divots, holes, pimples, etc
in 2d paint software. First I
will show what these are supposed to look like using a 3d application
to simulate how light reacts to these shapes,
then I'll show you a 2d painting demo using what we learned in the
first step, and then a more procedural way to
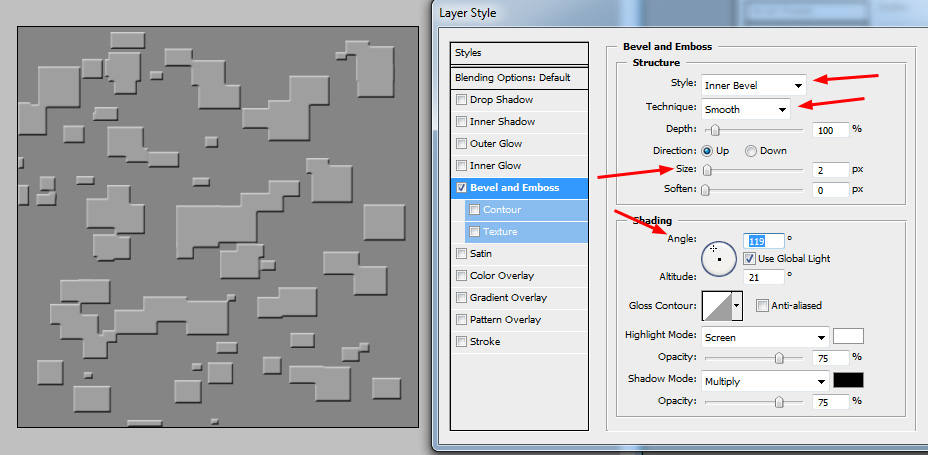
achieve this look in Photoshop using the Emboss layer style.
You have two choices with this lesson, watch me discuss the issue in the video below, or read the full text.
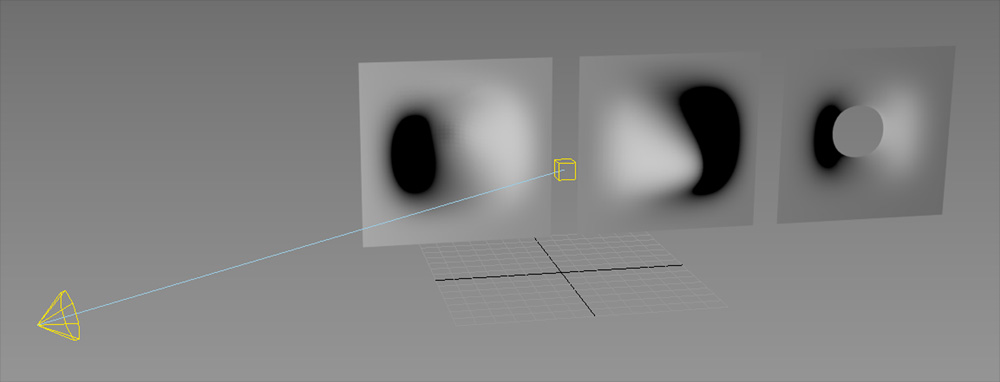
3D Simulation
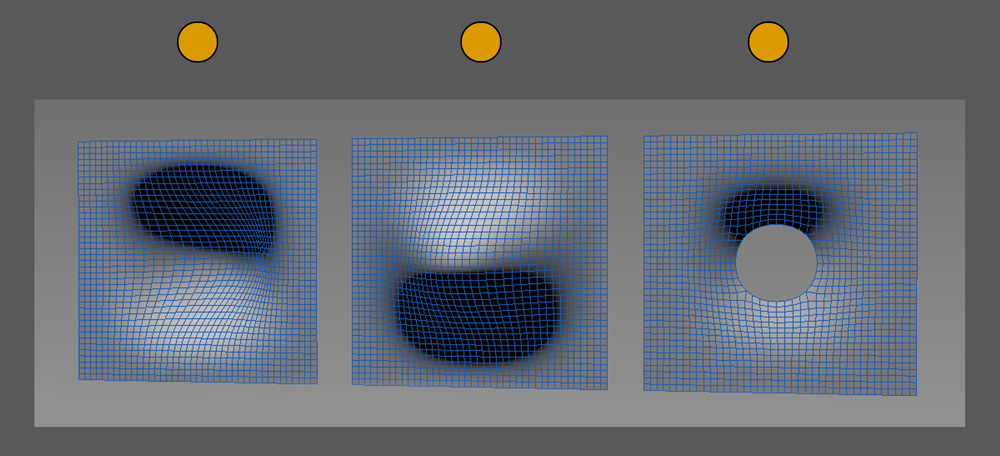
So let's start in 3D. Here's 3 seperate planes, the one on the left
bumps inwards, the second bumps outwards, and the third bumps inward
but has a hole.
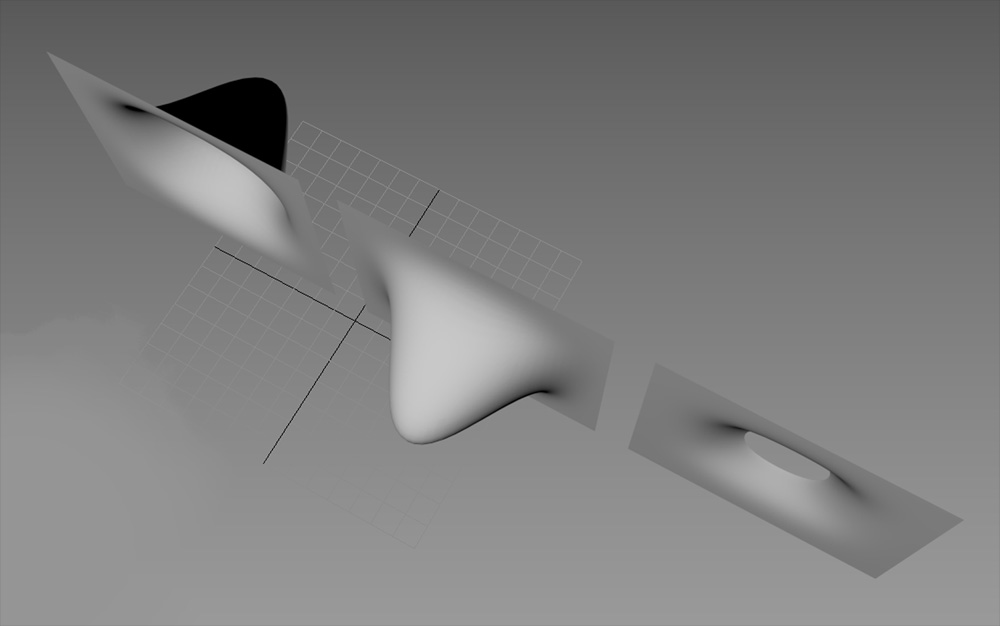
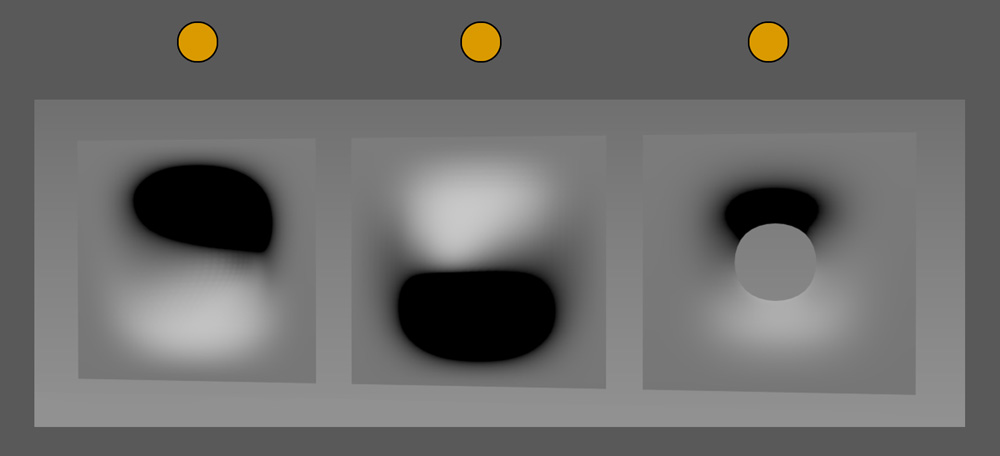
The lighting is all from above the surface. Notice how the light and
dark appear in relation to the light.
2D Paint
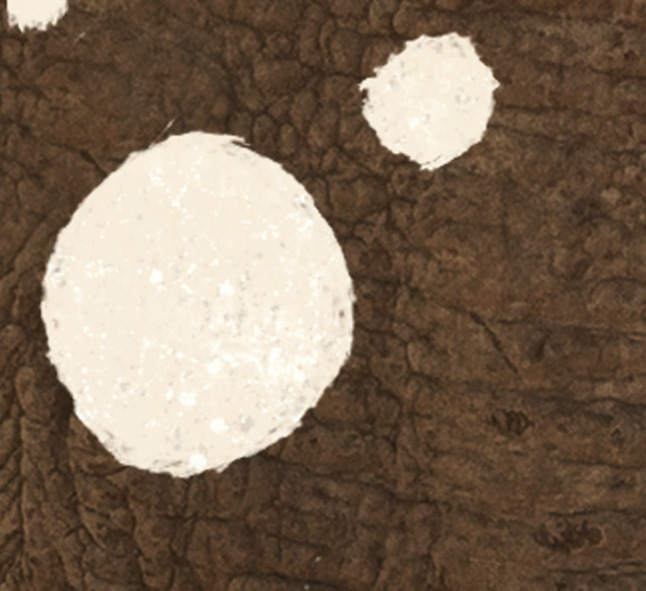
Now lets do some 2d painting. Here's a weird alien plant I made
several years ago, which needed both holes and also lumps on it. Notice
how right now the plant surface looks really flat.
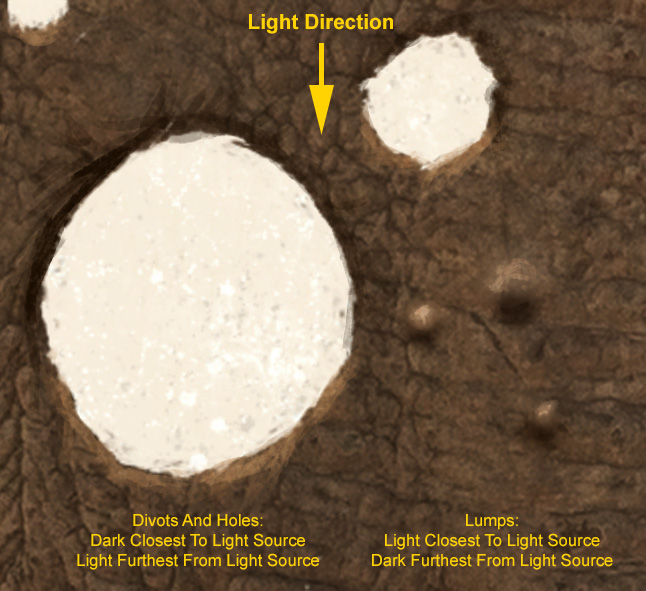
Take a soft brush and paint a darker and light color as seen in the
image below. Within seconds, you can give dimensionality to that hole,
and add some lumps / bulges to the surface.
Emboss In Photoshop