Painting Starship Panels In Photoshop
By Neil Blevins
Created On: Feb 9th 2012
Updated On: Jan 23rd 2024
Software: Photoshop
Go here
to read this tutorial in Russian.
Pretty much anyone who
was born in the 70s has a soft spot for the original Star Wars films. I
certainly do, they've always been a huge influence on my work. One of
the many things that influenced me was the hull of the Death Star. All
the panels, trenches, greebles. Here's a quick tutorial showing a
technique for painting starship panels in a similar style using
photoshop.
You have two choices with this lesson, watch me discuss the issue in
the video below, or read the full text.
How To Paint Them
First, paint a medium grey on your canvas in photoshop.

Now create a new layer. Here we'll paint our first layer of panels.
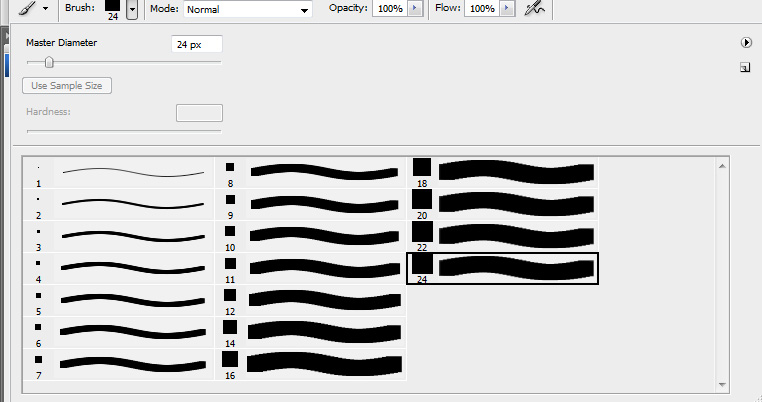
First, we'll need a panel brush. Find one of the default photoshop
brushes that is square, I found them under the "Square Brushes" brush
file...
Now lets customize the brush. First, change the spacing to a much
larger number...
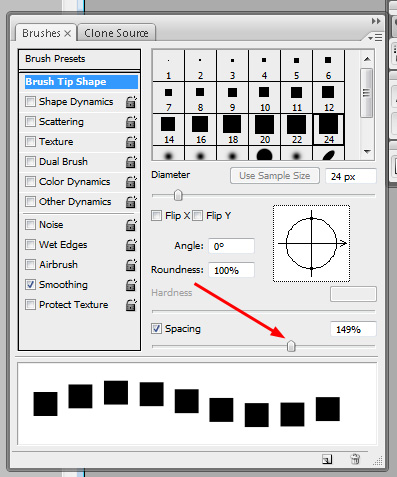
Under Shape Dynamics, increase the size and roundness jitter.

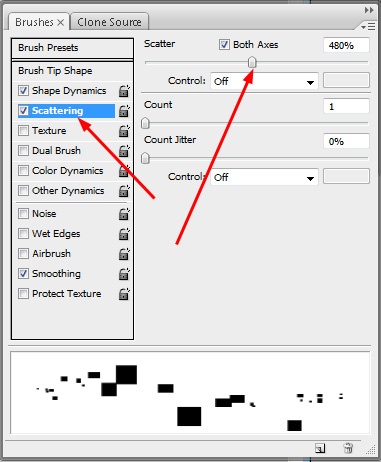
Turn scatter on, and increase the amount...
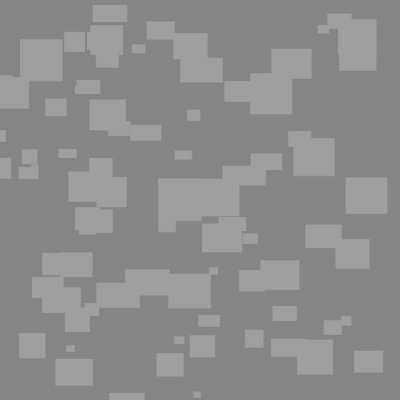
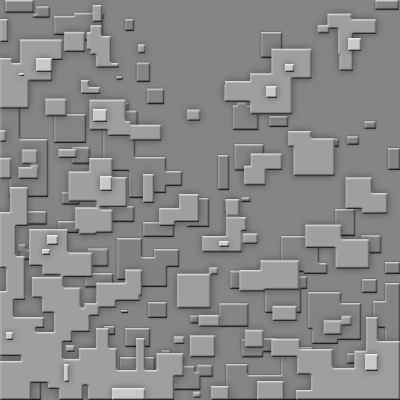
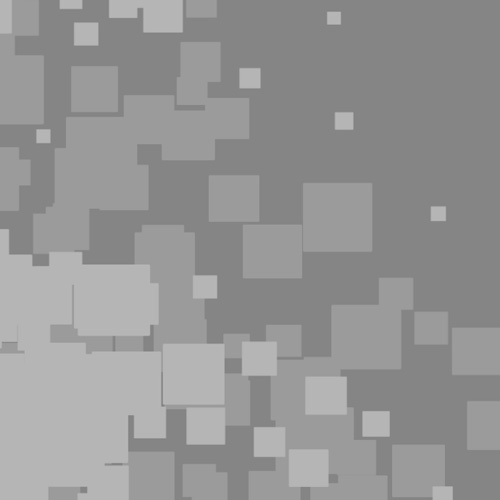
Now paint with the brush using the mouse with a slightly lighter
grey value on your top layer until you get some panels...
Now with that layer selected, go to Layer -> Layer Style ->
Bevel & Emboss. Play with parameters such as Style, Technique, Size
and Shading Angle. Remember, be a little bit subtle, the default values
may be a bit too strong.

So this is giving a little bit of 3Dimensionality to your panels,
basically, it's simulating what light might look like hitting the
beveled edges of the panels.
Now it's time for shadows, lets fake an ambient occlusion pass using
Outer Glow, but instead of a light glow, make the glow dark...
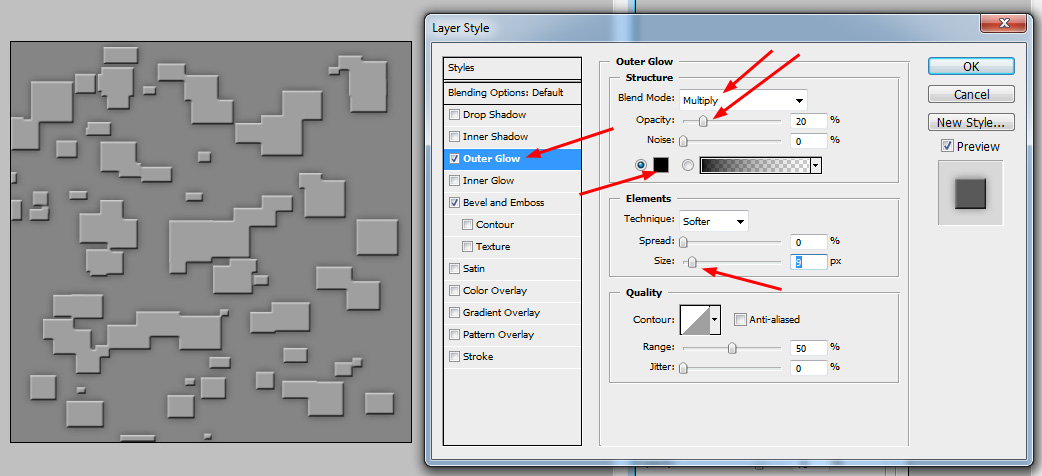
Set Blend Mode to Multiply, Opacity to something low like 20%, color
to black, and Size to 9. If you make the size larger, the panels will
seem to be higher off the floor. If you make the size smaller, the
panels will seem more flush with the floor.
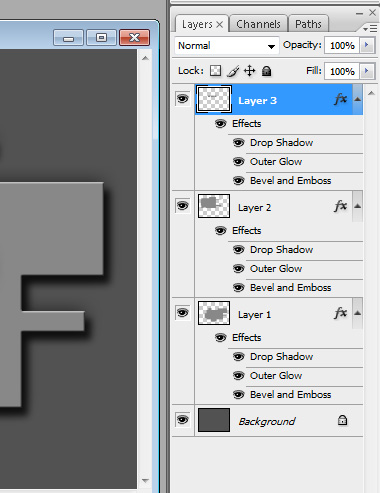
Now lets duplicate this layer, clear the paint (but leave the layer
styles), and paint more panels of a different size in a different
color. I did 3 layers of panels to achieve this.
And remember, you don't have to only use the brush. Anything that's
on that layer will get the bevel and also the shadow. So you can use
the rectangular selection tools to select a random looking area, then
fill it with grey, and make panels that way. Here's an example...
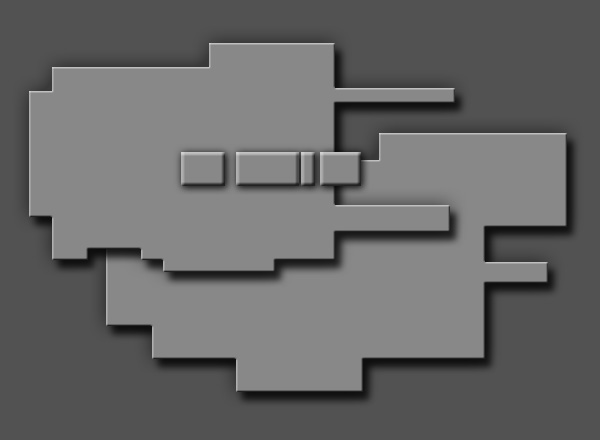
This is 3 layers on top of each other using the selection tool. Also,
as
well as the "Bevel and Emboss" and the "Outer Glow" styles, I added a
"Drop Shadow" style as well. So now I have shadows from an ambient
light (the "Outer Glow" style) and directional shadows from a key light
(the "Drop Shadow" style).
Remember, if you're too heavy handed with these layer styles, your work
can look cheesy. But with careful brushing and subtle use of the layer
styles, you can do pretty convincing paneling, like the paneling I made
for this image...
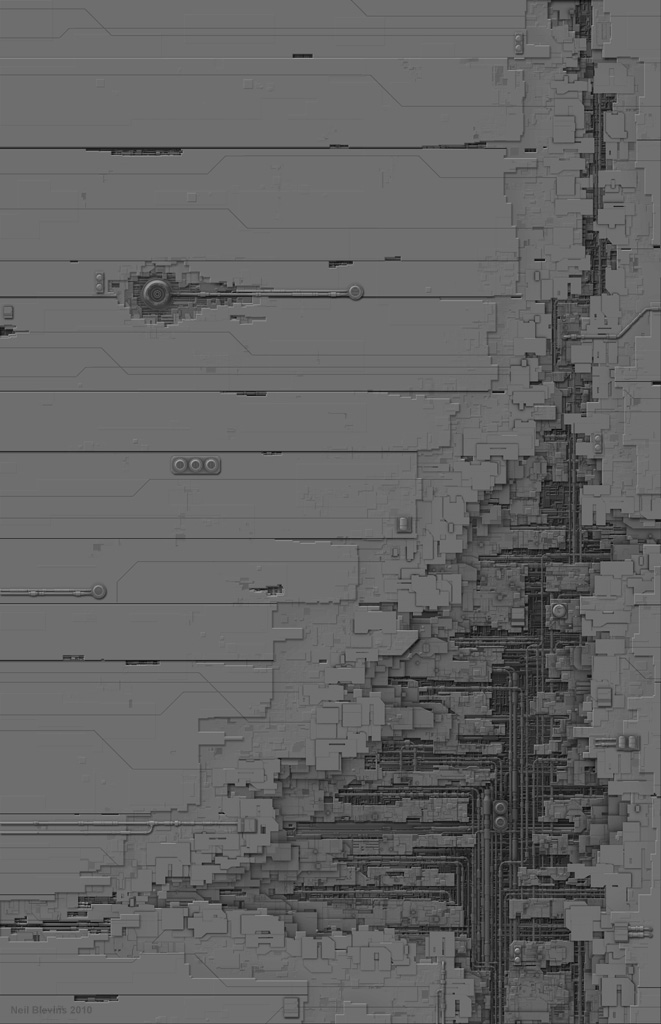
While the pipes in this image are full 3d objects modeled in 3d studio
max, a lot of the panels are in fact just 2d panels painted in
photoshop
using this technique.
What To Do With Them
Many people over the years have asked me "Can I use
these images as textures for 3d spaceships?" While you could
potentially do this, I really don't recommend it because it will look
wrong. Why do you say? Because the lighting information (directional
cast shadows, and bevels) are already baked into your image. Let me
show you an example.
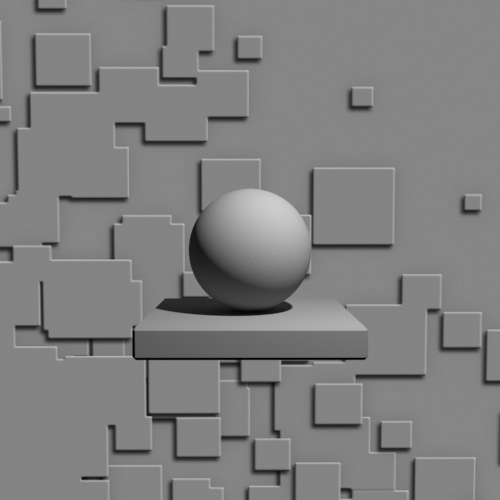
Here's a 3d sphere in 3dsmax rendered in front of one of these starship
hull backgrounds. Looks ok.
Now let's move the light to bottom right in your 3d scene. Wow that
looks bad.
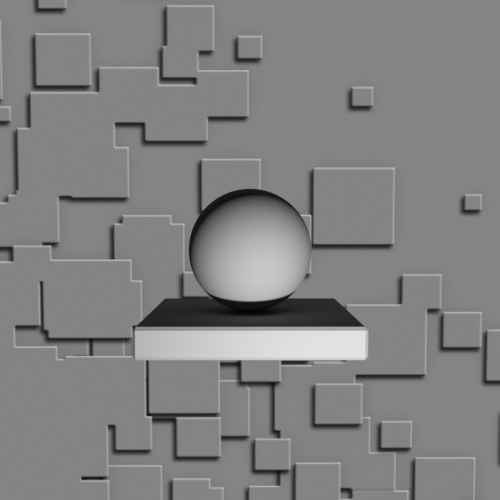
This is because the light direction on the background doesn't move with
the 3d light. So the bevel / castshadow technique is great for
paintings, but
horrible if you want to use them as textures in a 3d application.
A much better way to do this is to make a real texture using your
square brushes, and turn it
into a bump map. So take your image you painted...
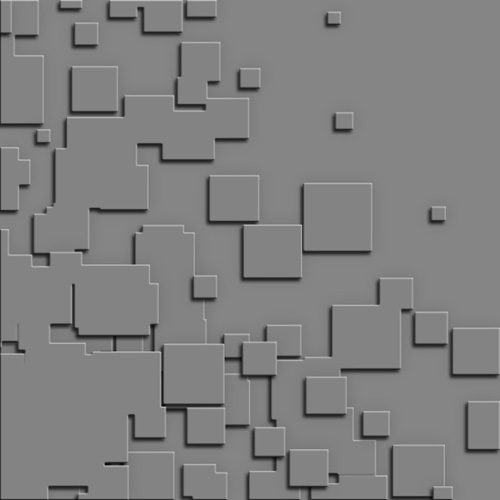
And turn off the all the layer styles, and then make sure your squares
are brighter than the background.
Now apply this as a bump map in a material in your 3d application.
Let's do our 3d test again.

Now when you move the light, the shadows on the background object look
correct.

Conclusion
Hope that gives you some insight into the technique.
Use the layer styles if painting a 2d image, use bump maps without
layer styles if you're planning on using it in 3d. And if you want to
learn even more on this technique, please consider buying this video
tutorial: Designing
An Epic Starship
This site is ©2026 by Neil Blevins, All rights
are reserved.
To see hundreds of other tutorials similar to this one, visit the
Neil Blevins Education Site