Have you ever needed a large groundplane in 3d, and every time
you apply a texture map to it, the tiling is super obvious? Here's a
trick to
help reduce the problem of tiling textures on large ground surfaces.
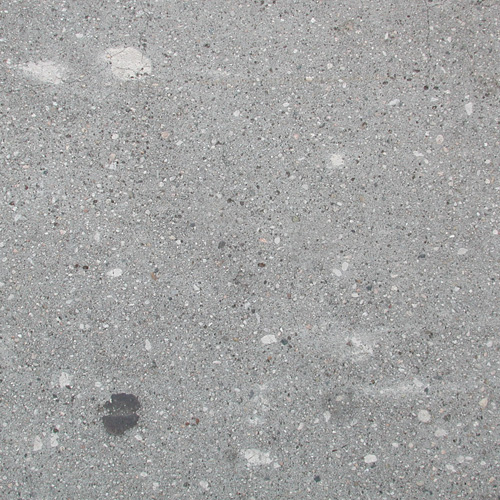
For example, you need a concrete floor. You have a photo of concrete
that you take with your camera.
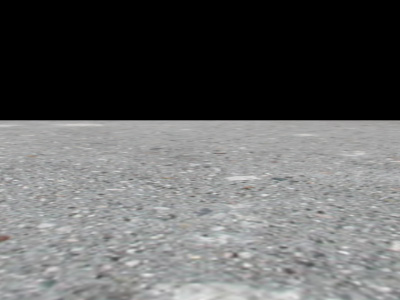
Now lets apply it to your 3d ground plane. It's a good start, but
it's
too large...
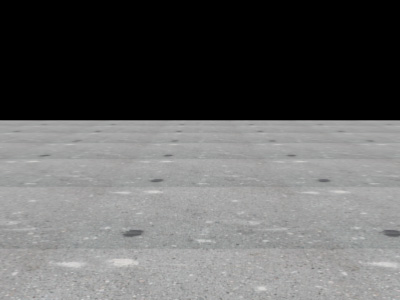
Adjust the tiling of your bitmap, now it's the right size, but you
can see the edges of your bitmap tiling into infinity...
Lets bring the image into photoshop, and make the edges tilable
using the technique outlined in my tutorials: Removing
Brightness Variation To Make
Tileable Textures
and Offset
Filter To Make Tileable Textures.
Here's the result in 3d, looks better, but you're still seeing
a repeating pattern...
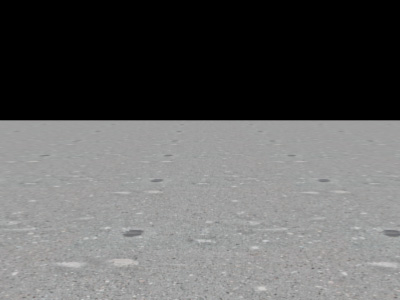
This is because the texture has a large feature (the dark grey
blotchy stain) that repeats again and again. Now you could just remove
parts of the texture until you no longer have any obvious features like
this one, but that will make the texture boring and uneventful. So
instead, here's a way to mix between maps to avoid tiling.
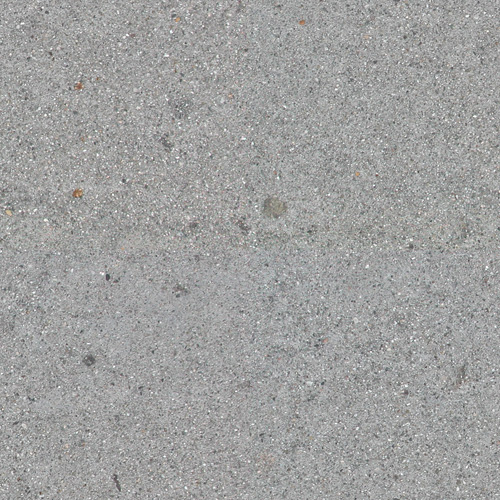
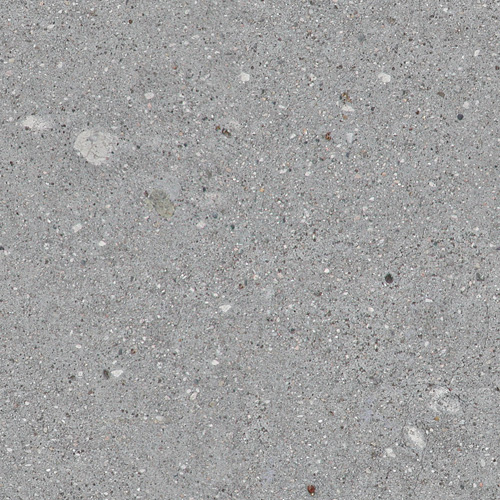
First, take 2 more photos of cement. Color correct them in your 2d paint package and make them tilable to they match with the first image...
Now in your material assigned to the ground plane, we will mix
between these 3 bitmaps instead of applying just a single bitmap. And
the mixing will be done with procedural noise.
Here's the material graph:
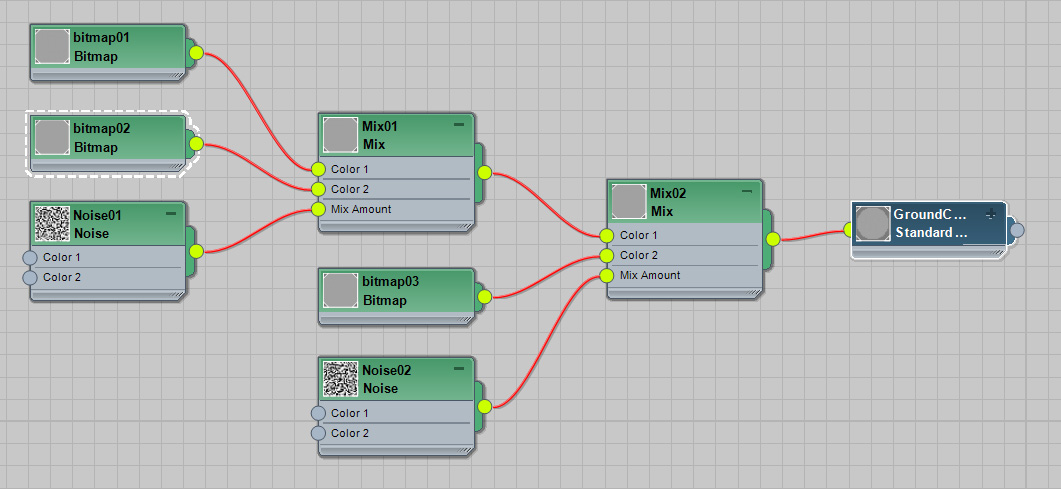
So you can see we are mixing our first bitmap and out second map,
and the mask is a procedural noise (the three nodes on the left).
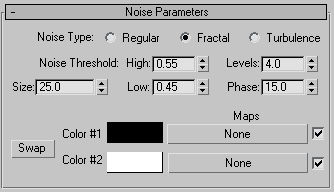
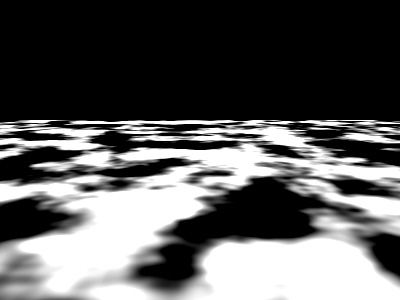
Here's an example of noise, using 3dsmax as an example.
Now look at the result in 3d. A lot of the tiling has gone away.
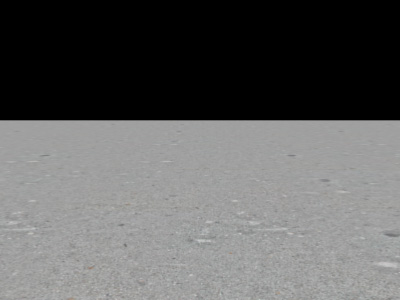
That's because the noise is randomly mixing between the two bitmaps, hence, sometime you're seeing the first bitmap, sometimes the second, and the obvious repeated pattern is broken. You may need to adjust the size of the noise larger or smaller to help hide the tiling...
Now lets add the 3rd bitmap. Mix between the result of your first
two bitmaps with the third bitmap, and blend using a different noise.
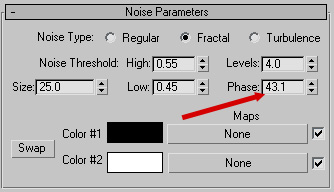
We get a different noise by changing its Phase value, although
translating the noise or changing its size slightly would also do the
trick.
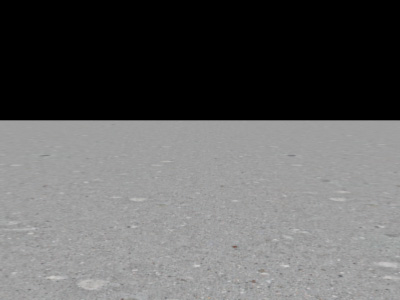
Now look at the 3d results. The tiling is even better hidden, because you're now blending between 3 bitmaps.
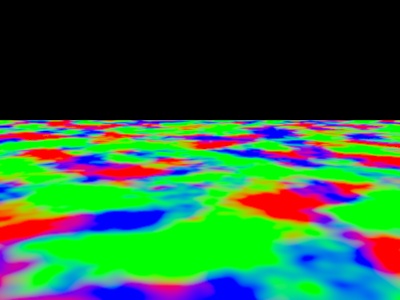
Here's a quick visualizer so you can see how the two different
noises blend the 3 maps together. If I replace the 3 bitmaps with 3
primary colors, you can see how red areas in the image below would show
your first bitmap, blue areas would reveal the second bitmap, and green
the third bitmap.
If you can't take more than 1 photo, you can also try using the same
bitmap 3 times, just change the tiling or offset of the bitmap to
manually make 2 "new bitmaps" using the same source image.
Also, play with the size of the noises you use, the phase of the
noise, and the high and low threshold to achieve better results.
While this trick works in any 3d app that has procedural noise and a
way to mix between bitmaps, if you happen to be using 3dsmax, here's an
example file in 3dsmax 2022 format: tiling_trick.zip